Time & Expense FAQ
The following directions are for providers using the Time & Expense system. It is broken into the following categories:
Quicklinks:
Initial Setup
Logging In
Dashboard Navigation
My Time Navigation
Add Expenses to a Timesheet
Submitting your Timesheet
View Timesheet
View and Manage My Schedule
Approving Time – A Manager’s Quick Reference Guide
Initial Setup:
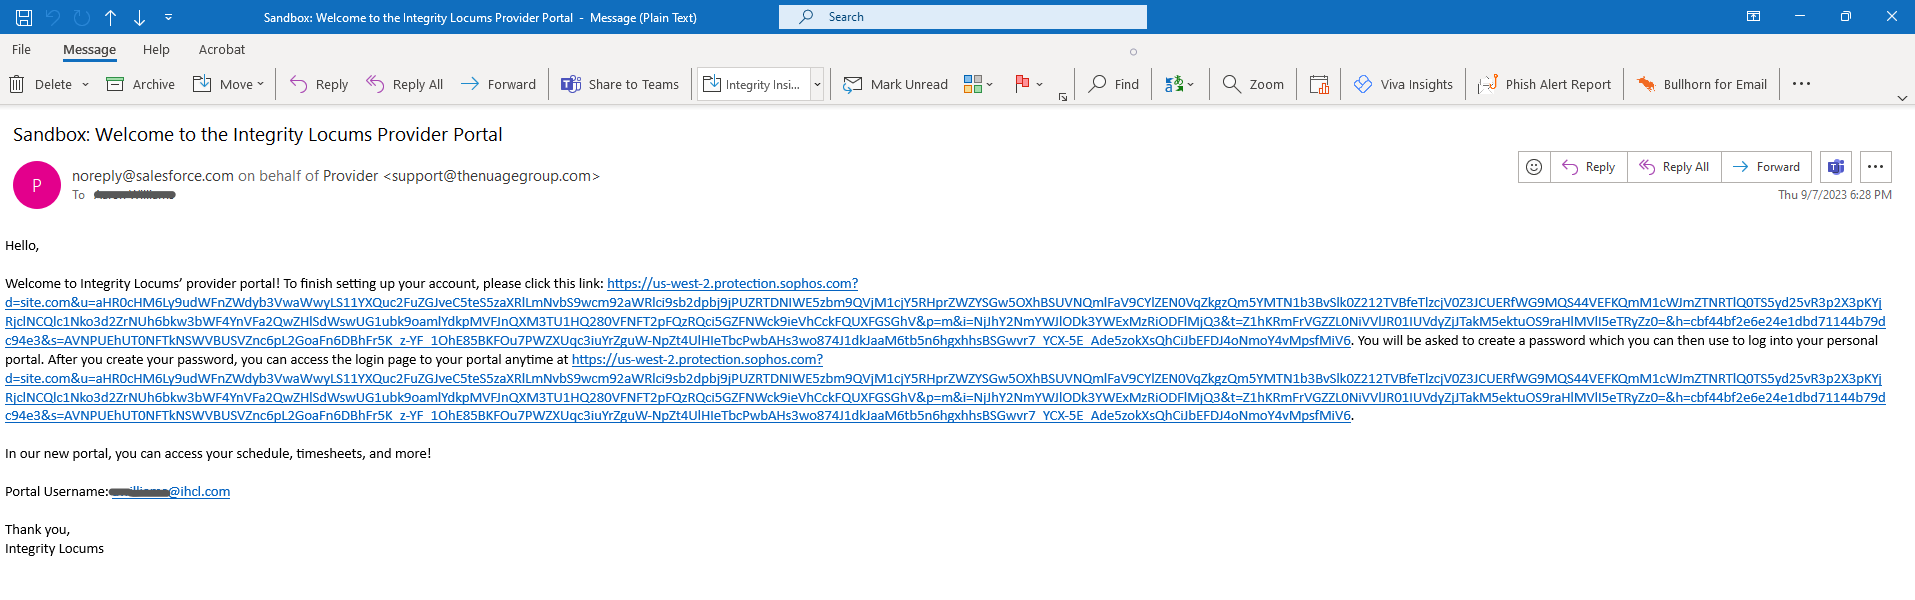
Providers who have completed the initial application will receive an email generated from our system that will provide you with a user name and link to set up your password.
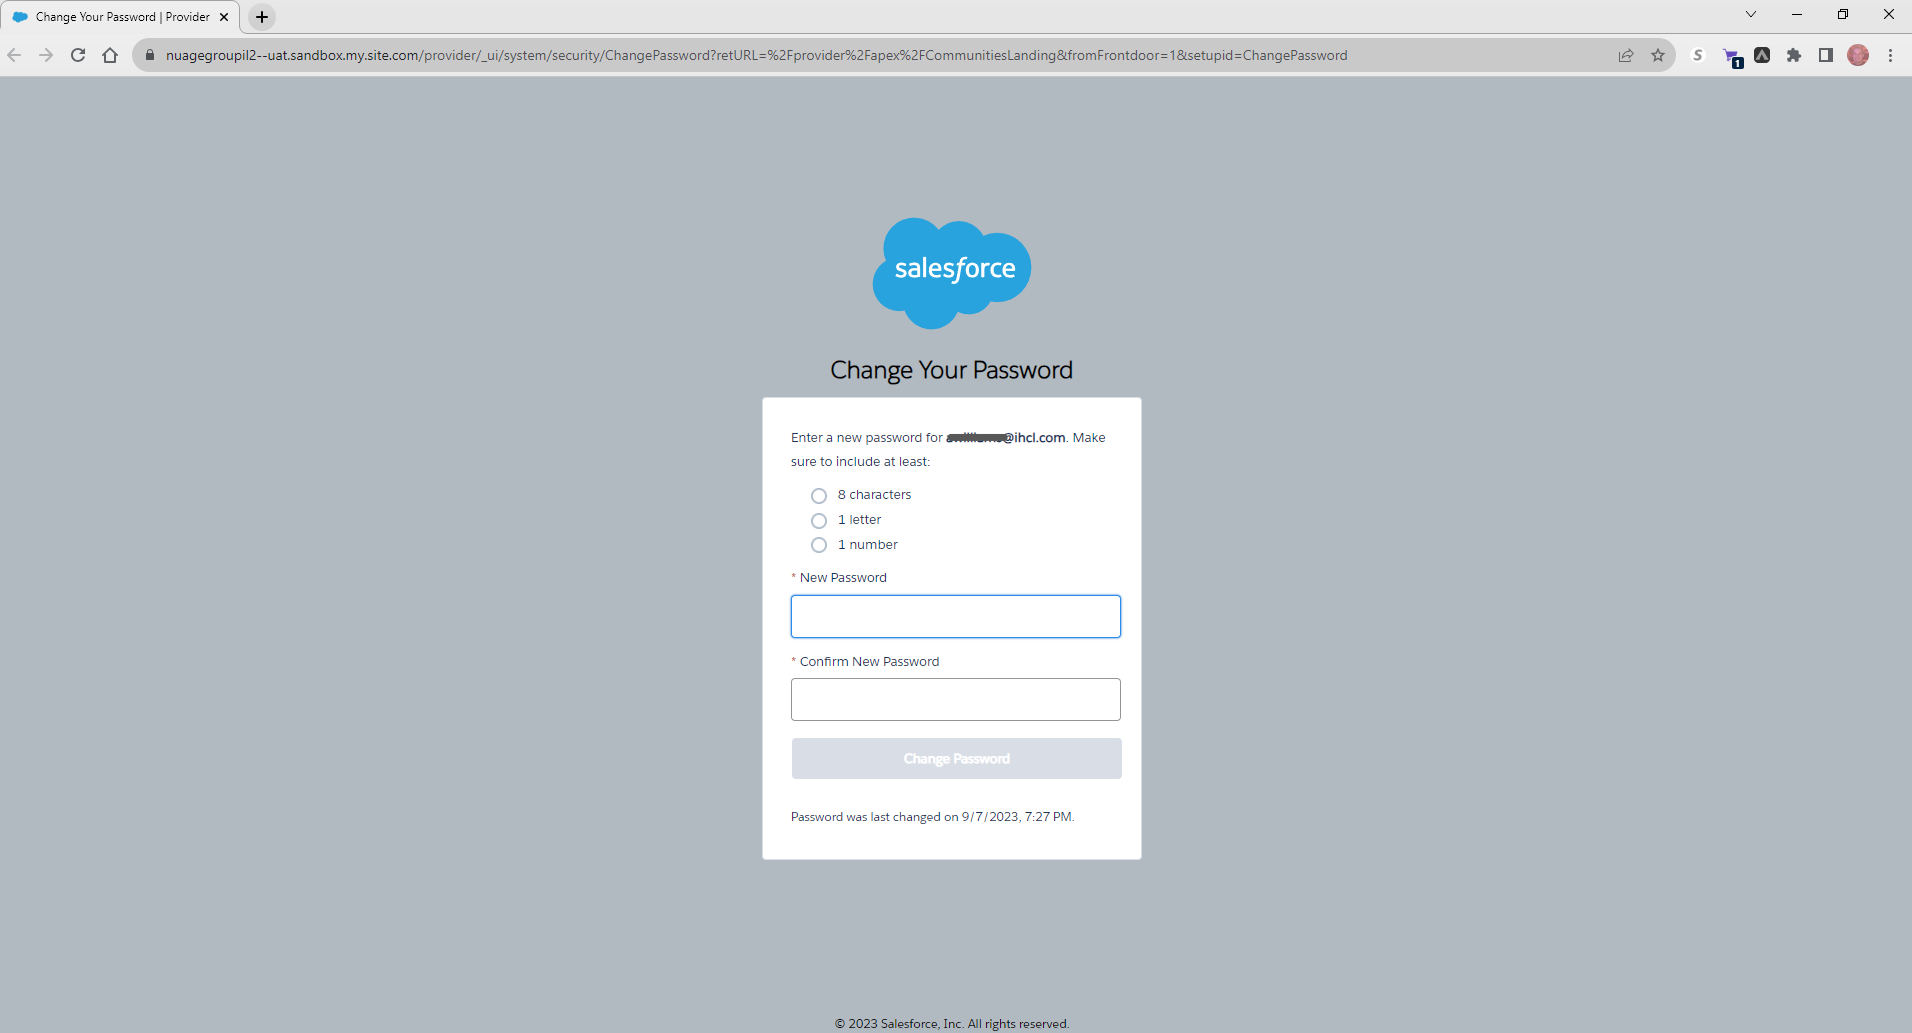
Follow the link to set up your password. You can change the suggested password to one of your choice. Please choose something memorable yet still complicated enough that someone can not guess it. Do NOT use: pass123, myname, or anything easily guessable. Do USE lowercase letters, uppercase letters, numbers and symbols if possible. Tip: Browsers like Google Chrome can suggest a password for you.
Once you have set up your password you will be directed to the new Provider Portal OR you can navigate to https://ihcl.com and click the Login button in the top right corner.

Logging In:
Go to the IHCL website (https://ihcl.com), click the “Login” button near the top right corner of the menu and input your username and password to log in.
NOTE: If you forget your password, you can reset it at any time by clicking the Forgot Password link.

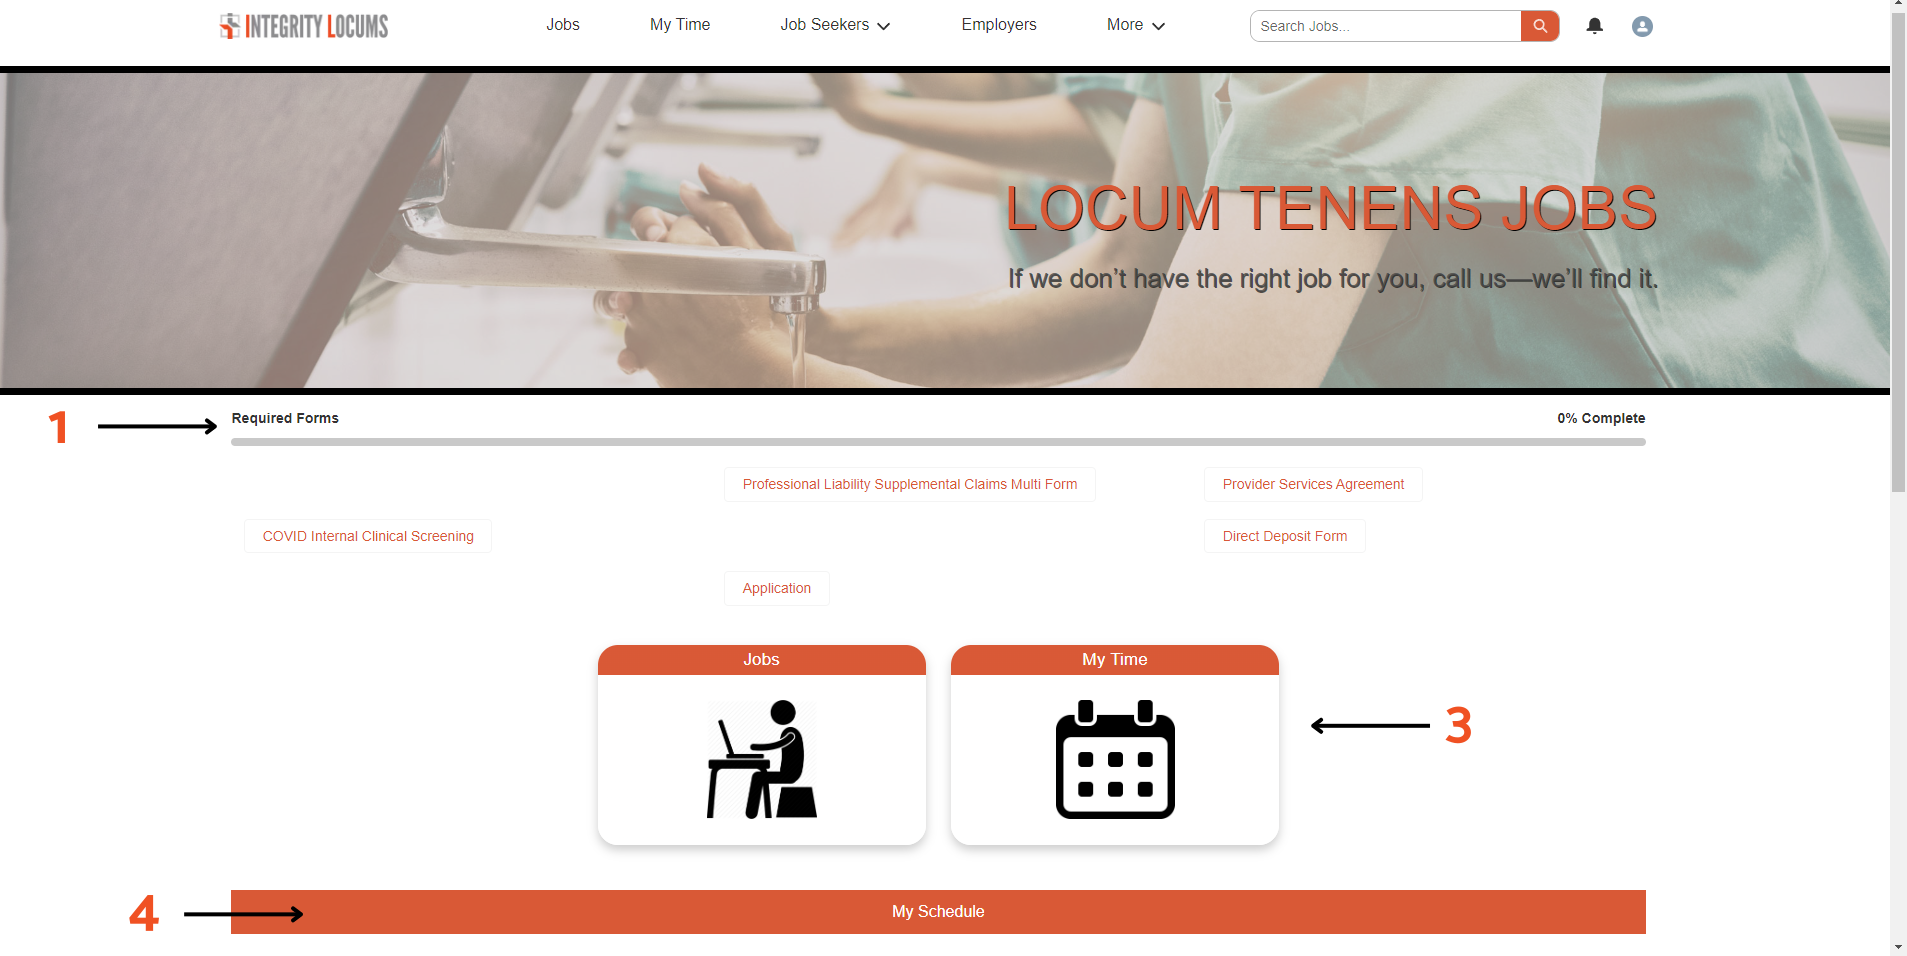
Dashboard Navigation:
The Provider Portal Dashboard is made up of 4 main parts.
1) Required Forms: A list of all required forms that you can click to digitally fill out, sign, and submit.
2) Jobs: Search for new locum tenens opportunities
3) My Time: Manage your timesheets and expenses (button to take you to your timesheets & expenses)
4) My Schedule: A calendar view showing upcoming shifts (Confirmed and unconfirmed), availability, and canceled shifts.
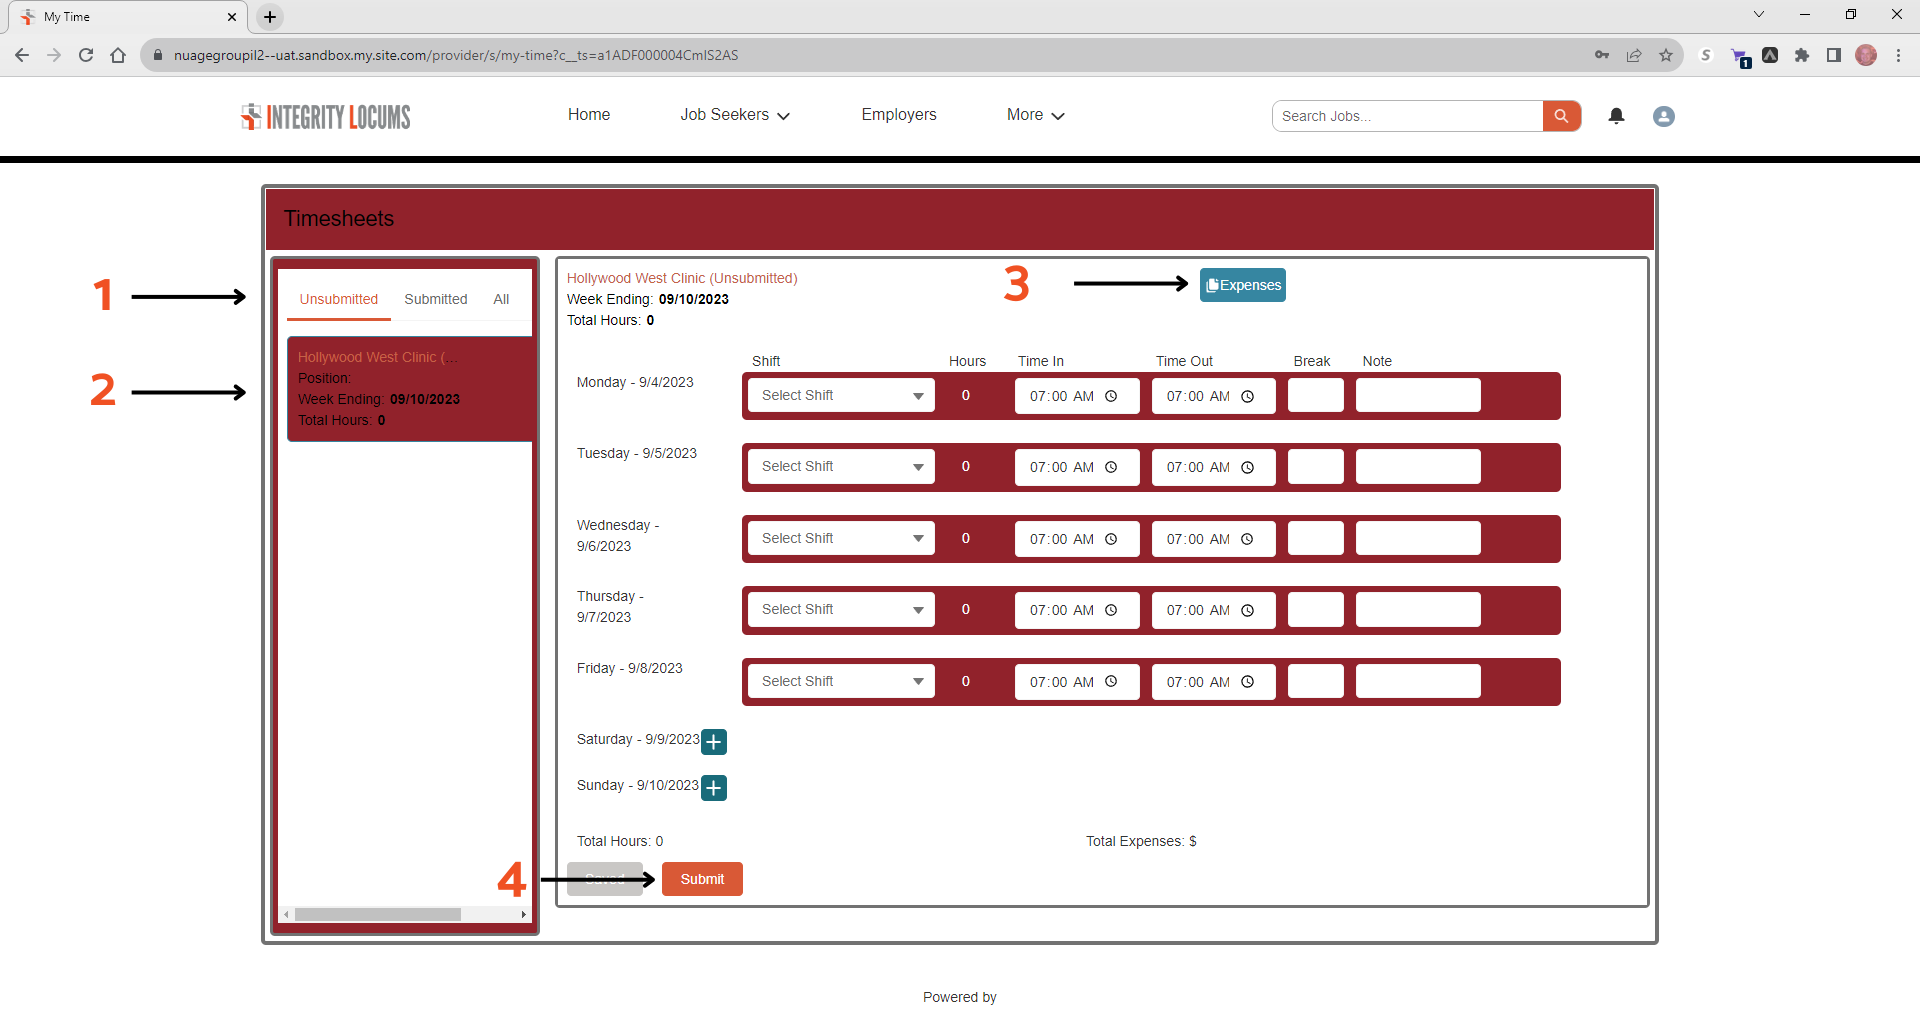
My Time Navigation:
Here is a quick summary of the My Time screen.
1) Timesheets: This is where you will find all your Timesheets (You can view unsubmitted, submitted, or all timesheets)
2) Click to select a timesheet (Listed by facility name) to enter hours, add expenses, and submit
3) Expenses: Click to view/add expenses associated with the selected timesheet
4) Submit your timesheet
1) Your timesheet will automatically be populated with your scheduled shift, you will just need to select the shift type from the dropdown menu (Shifts options will automatically populate).
2) Update your Time In and Time Out if they were different from your originally scheduled shift.
3) Add any applicable breaks.
4) Add any applicable notes about the shift.
5) Click the save button to save your progress prior to submitting the timesheet

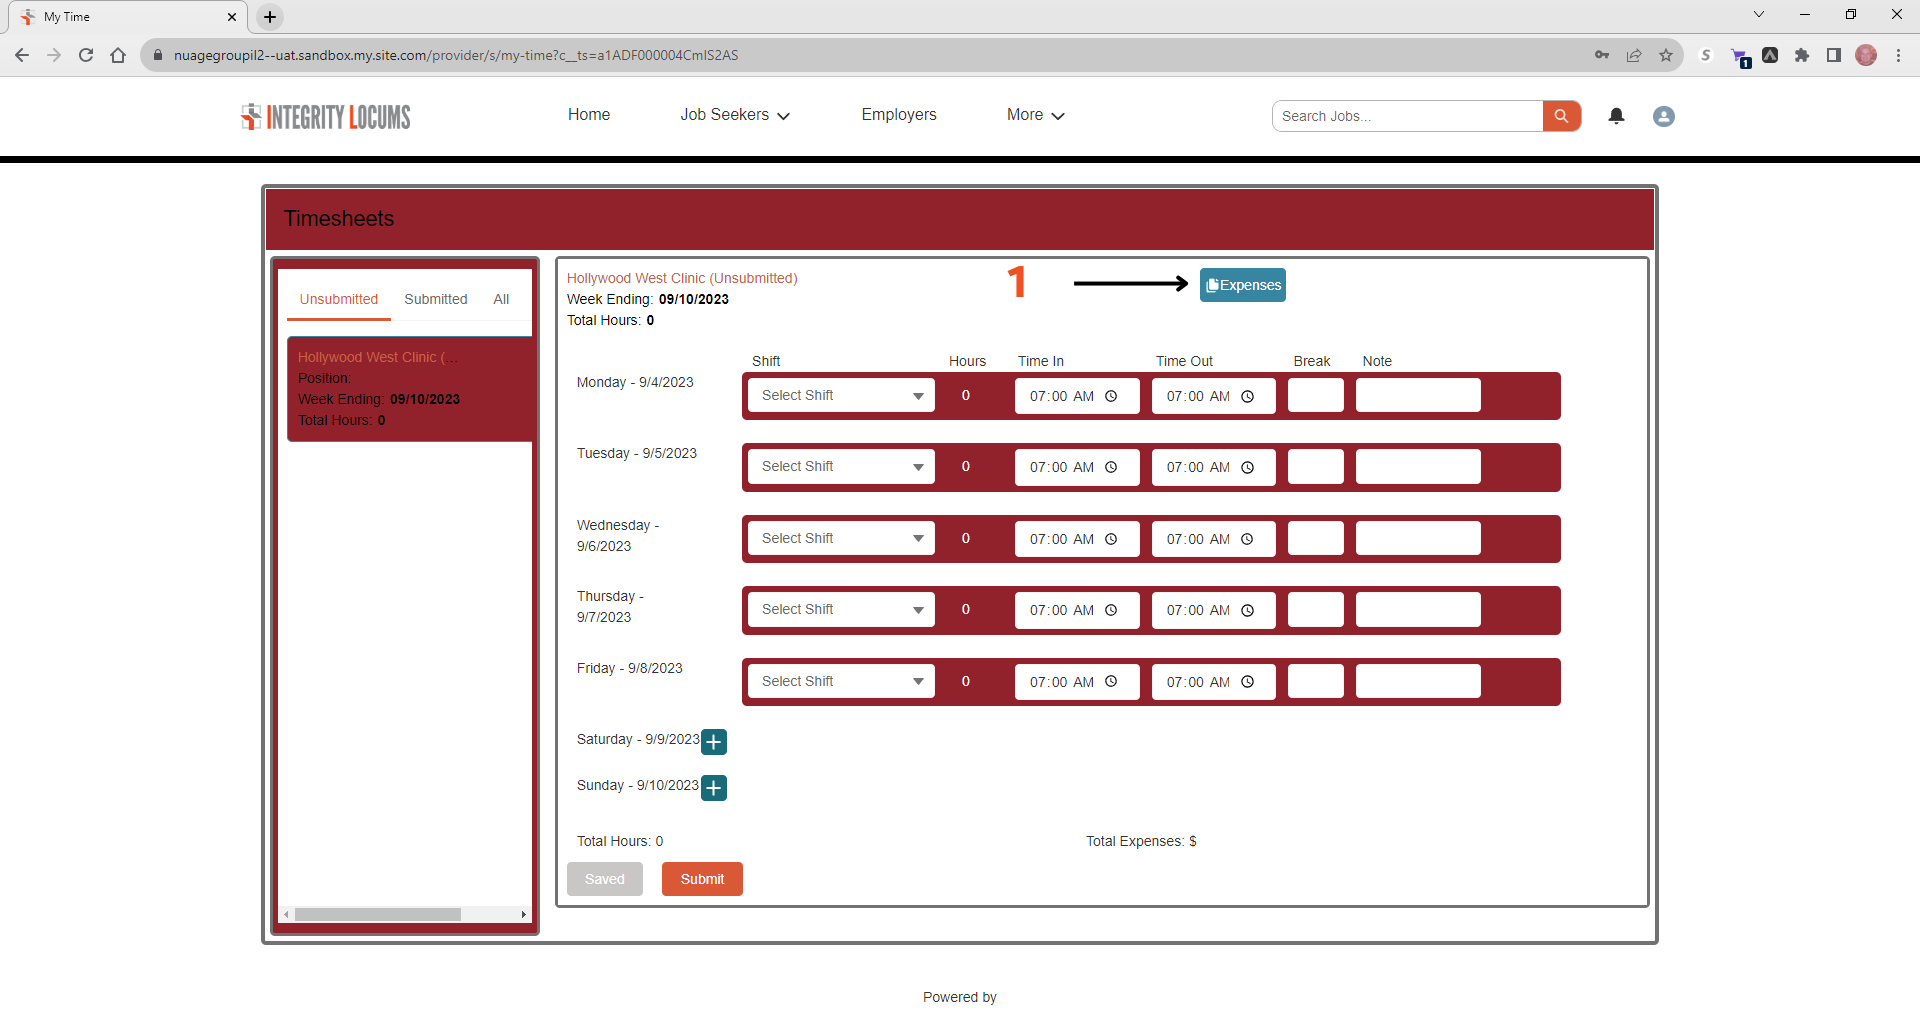
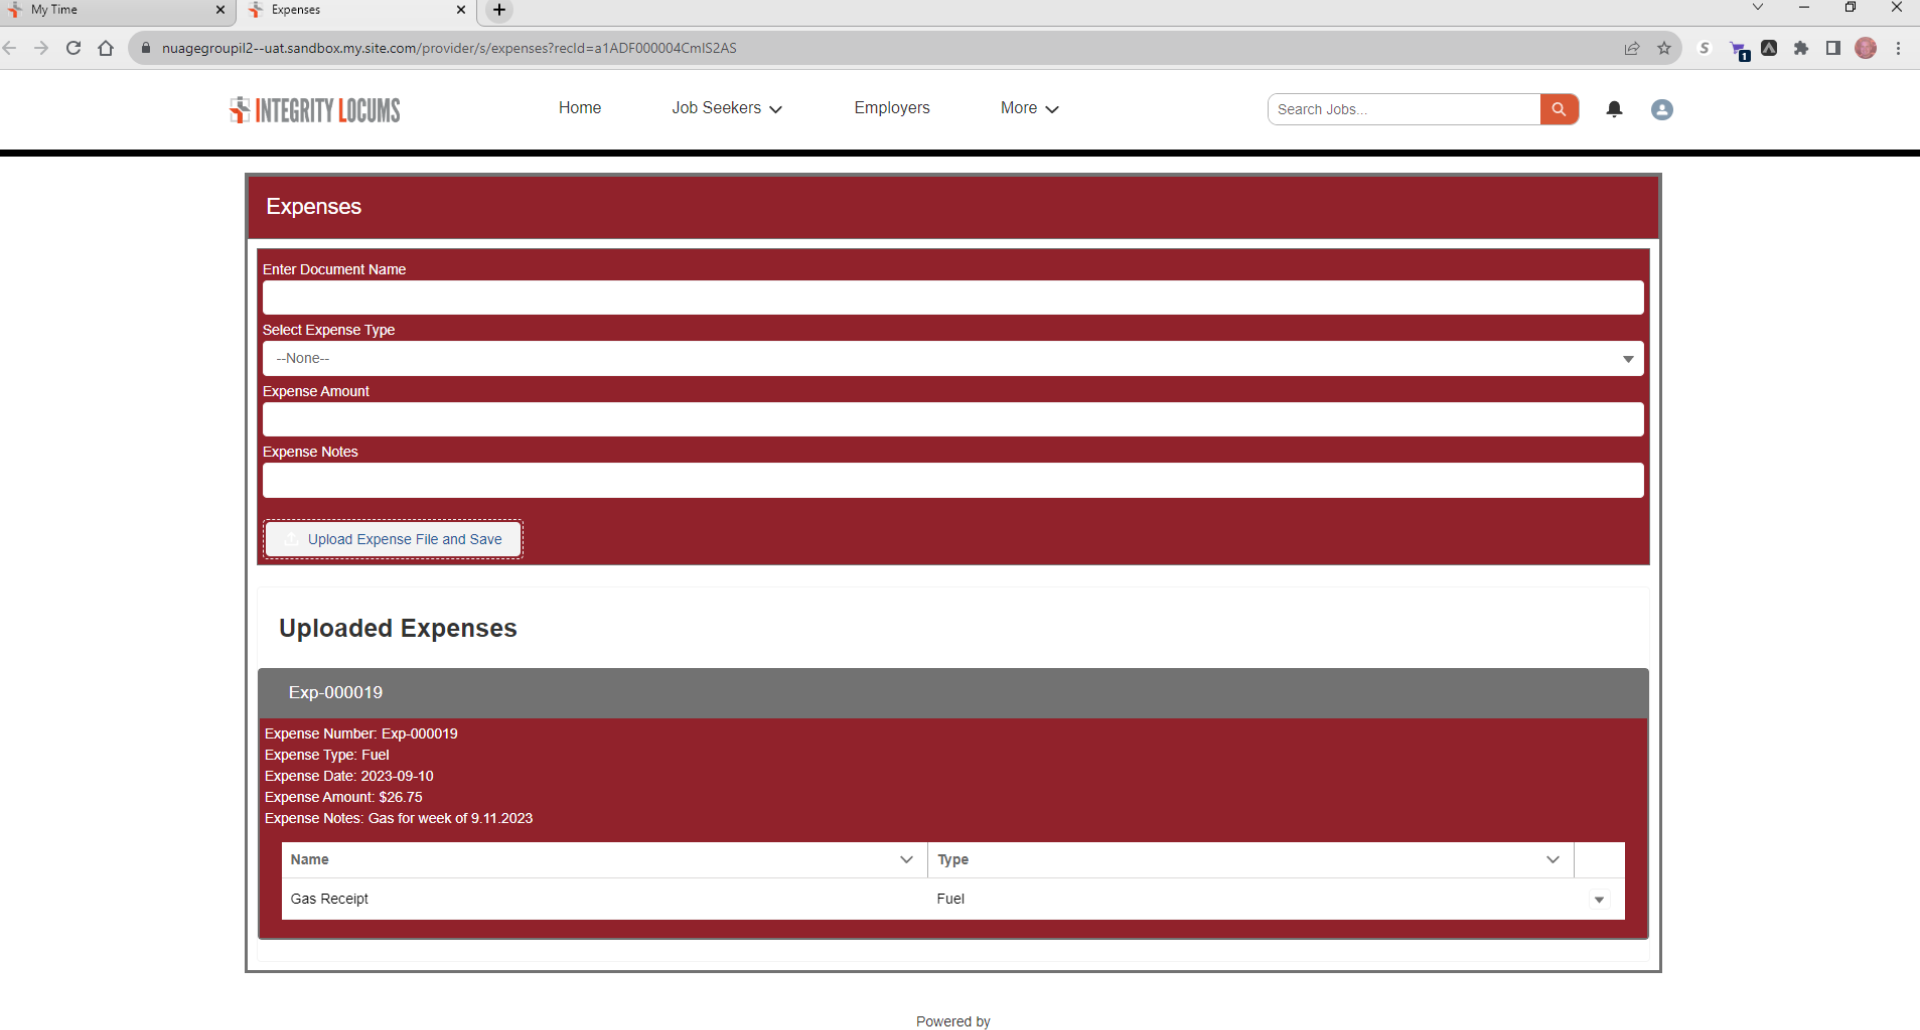
Add Expenses to a Timesheet:
To add expenses to a timesheet, follow these directions (To add a receipt, first make sure you have scanned your receipts and saved them on your hard drive):
1) When viewing a timesheet, select the Expenses button and you will be taken to a new screen to add expenses to the timesheet.
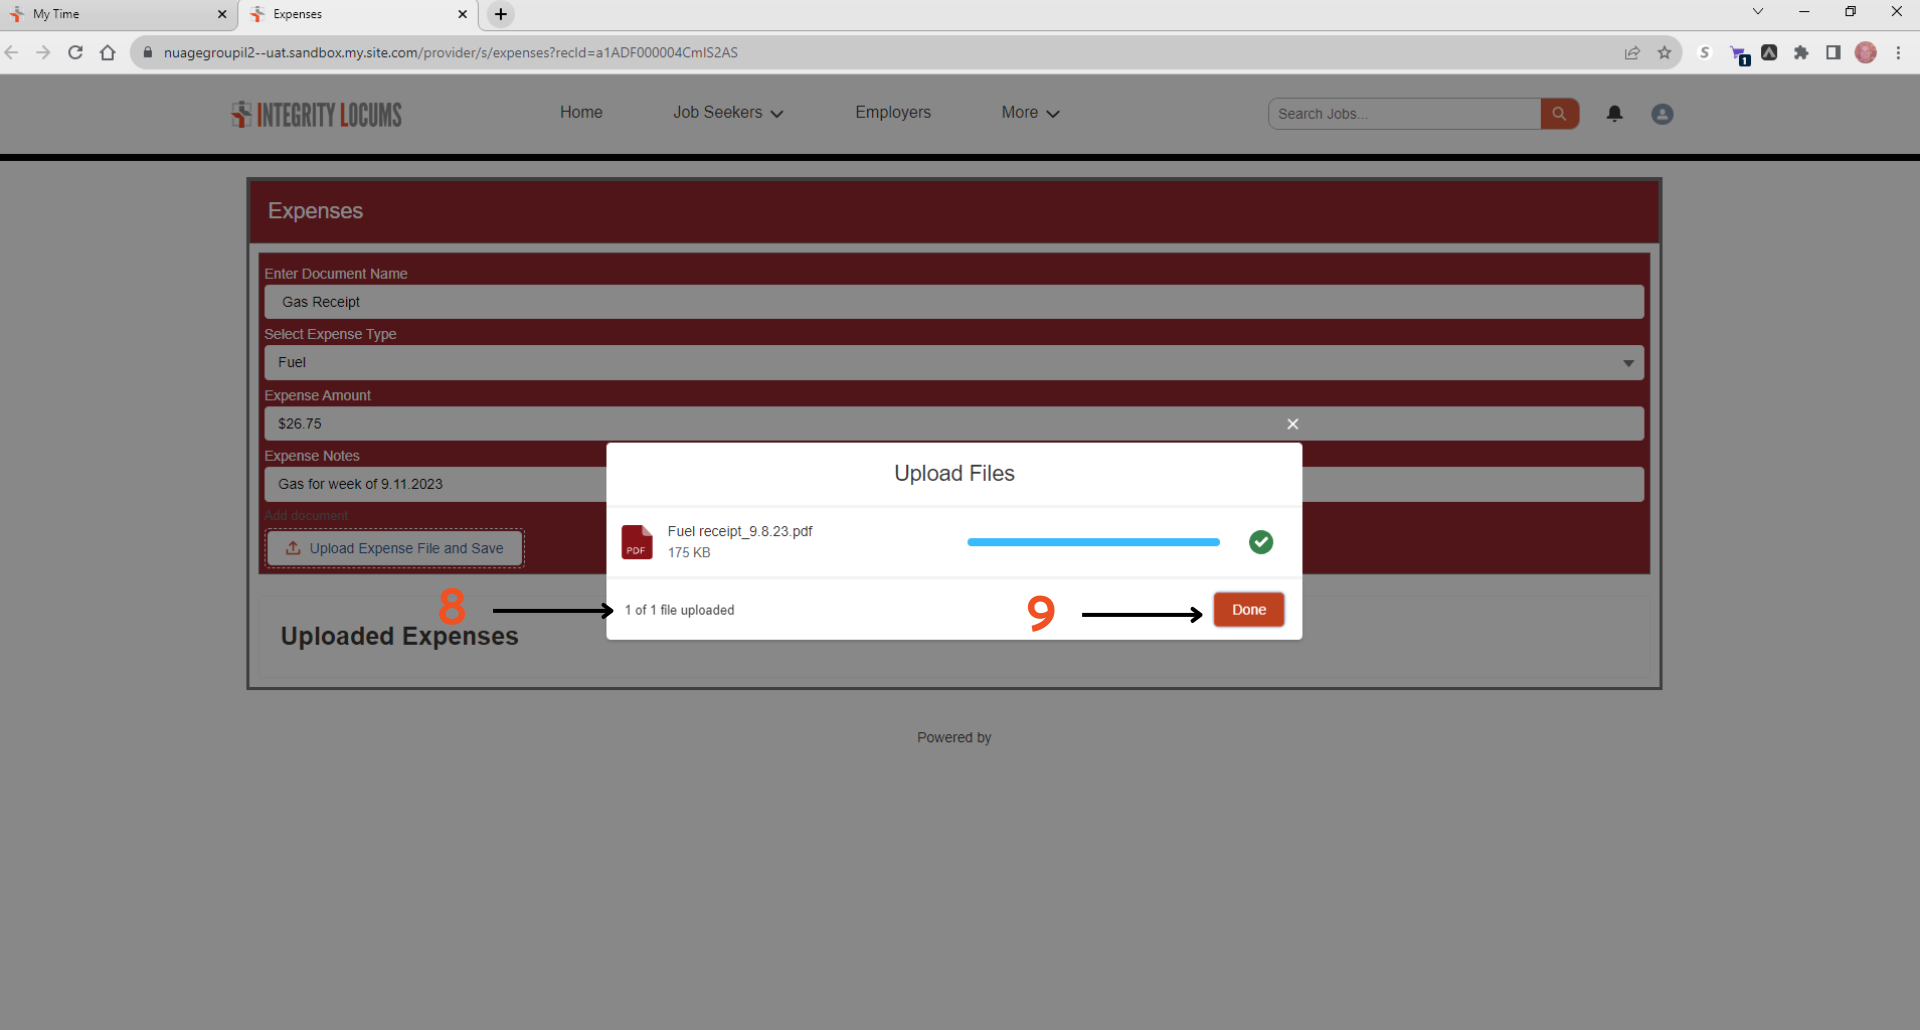
2) Enter the document name (e.g., Fuel receipt, rental car receipt, etc.)
3) Select the appropriate expense type from the dropdown list.
4) Enter the expense amount (Note: This must match the receipt)
5) Add any applicable notes about the expense.
6) Click the Upload Expense File and Save button. This will open a new interface to let you upload your receipt (More information will be in the next steps).

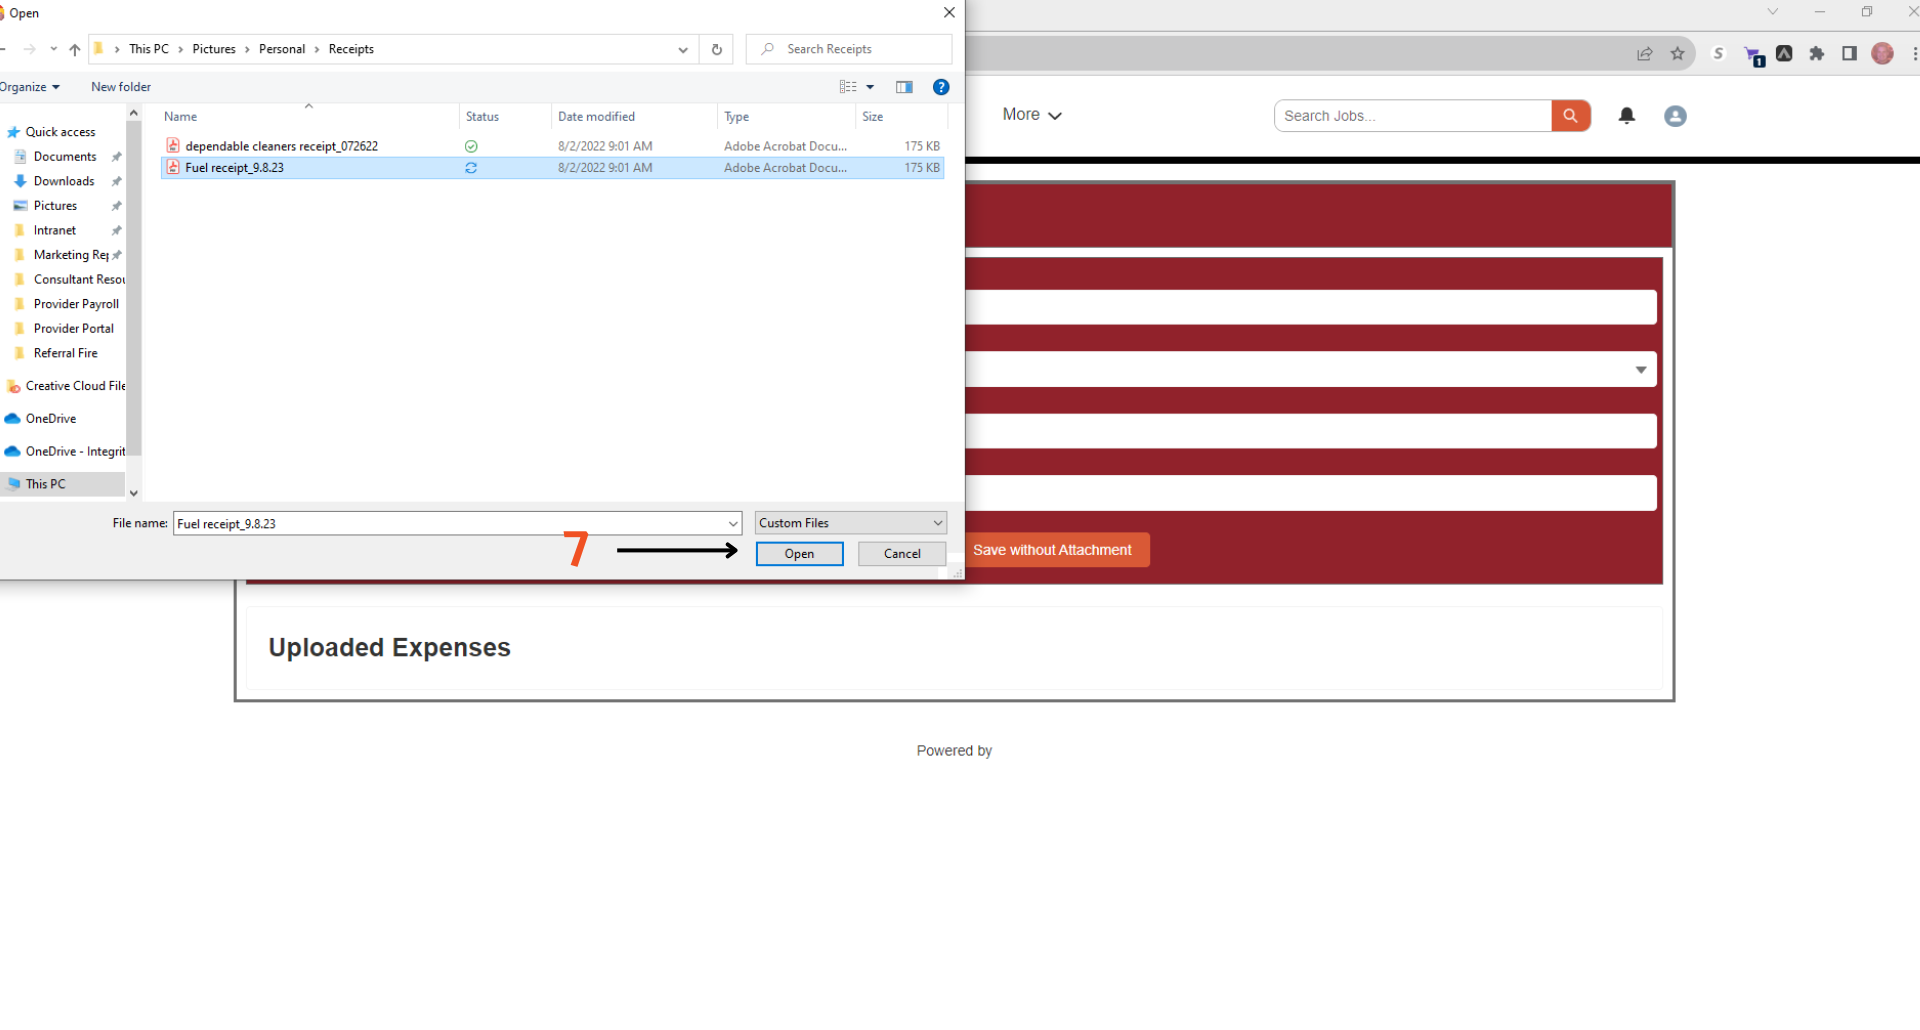
7) Select the file to upload from your computer and click “Open” to upload the receipt.
8) After selecting your file, you will see the status of your file upload.
9) Click Done to return to your expenses.
10) Repeat the above process until you have added all applicable expenses. The expenses screen will show all expenses you’ve already added.
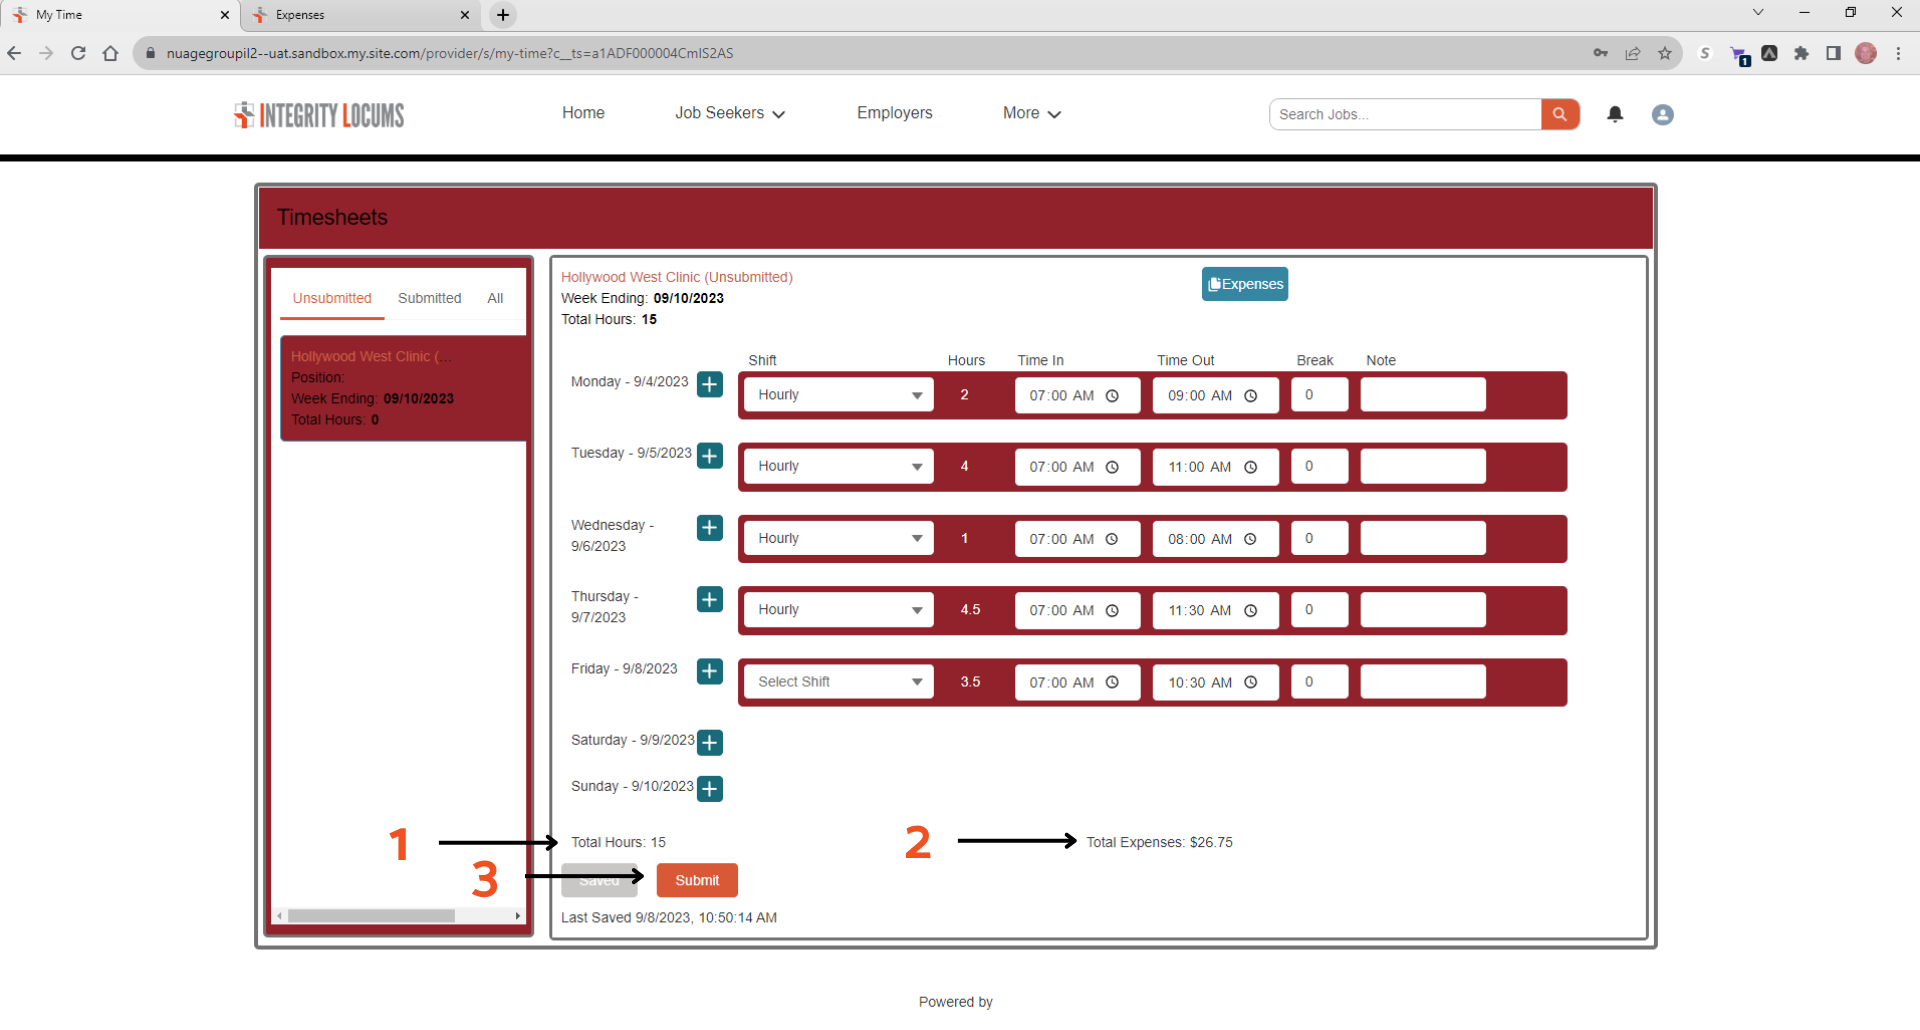
Submitting Your Timesheet:
After you’ve finished adding your shifts and any expenses, you’re now ready to submit your timesheet.
1) Verify your total hours listed on the timesheet match the hours you worked for that week.
2) Verify the total expenses match your expenses for the week.
3) Click on “Submit” to submit your timesheet for processing.
4) Once your timesheet is successfully submitted, you will see this message saying that your timesheet was successfully submitted.
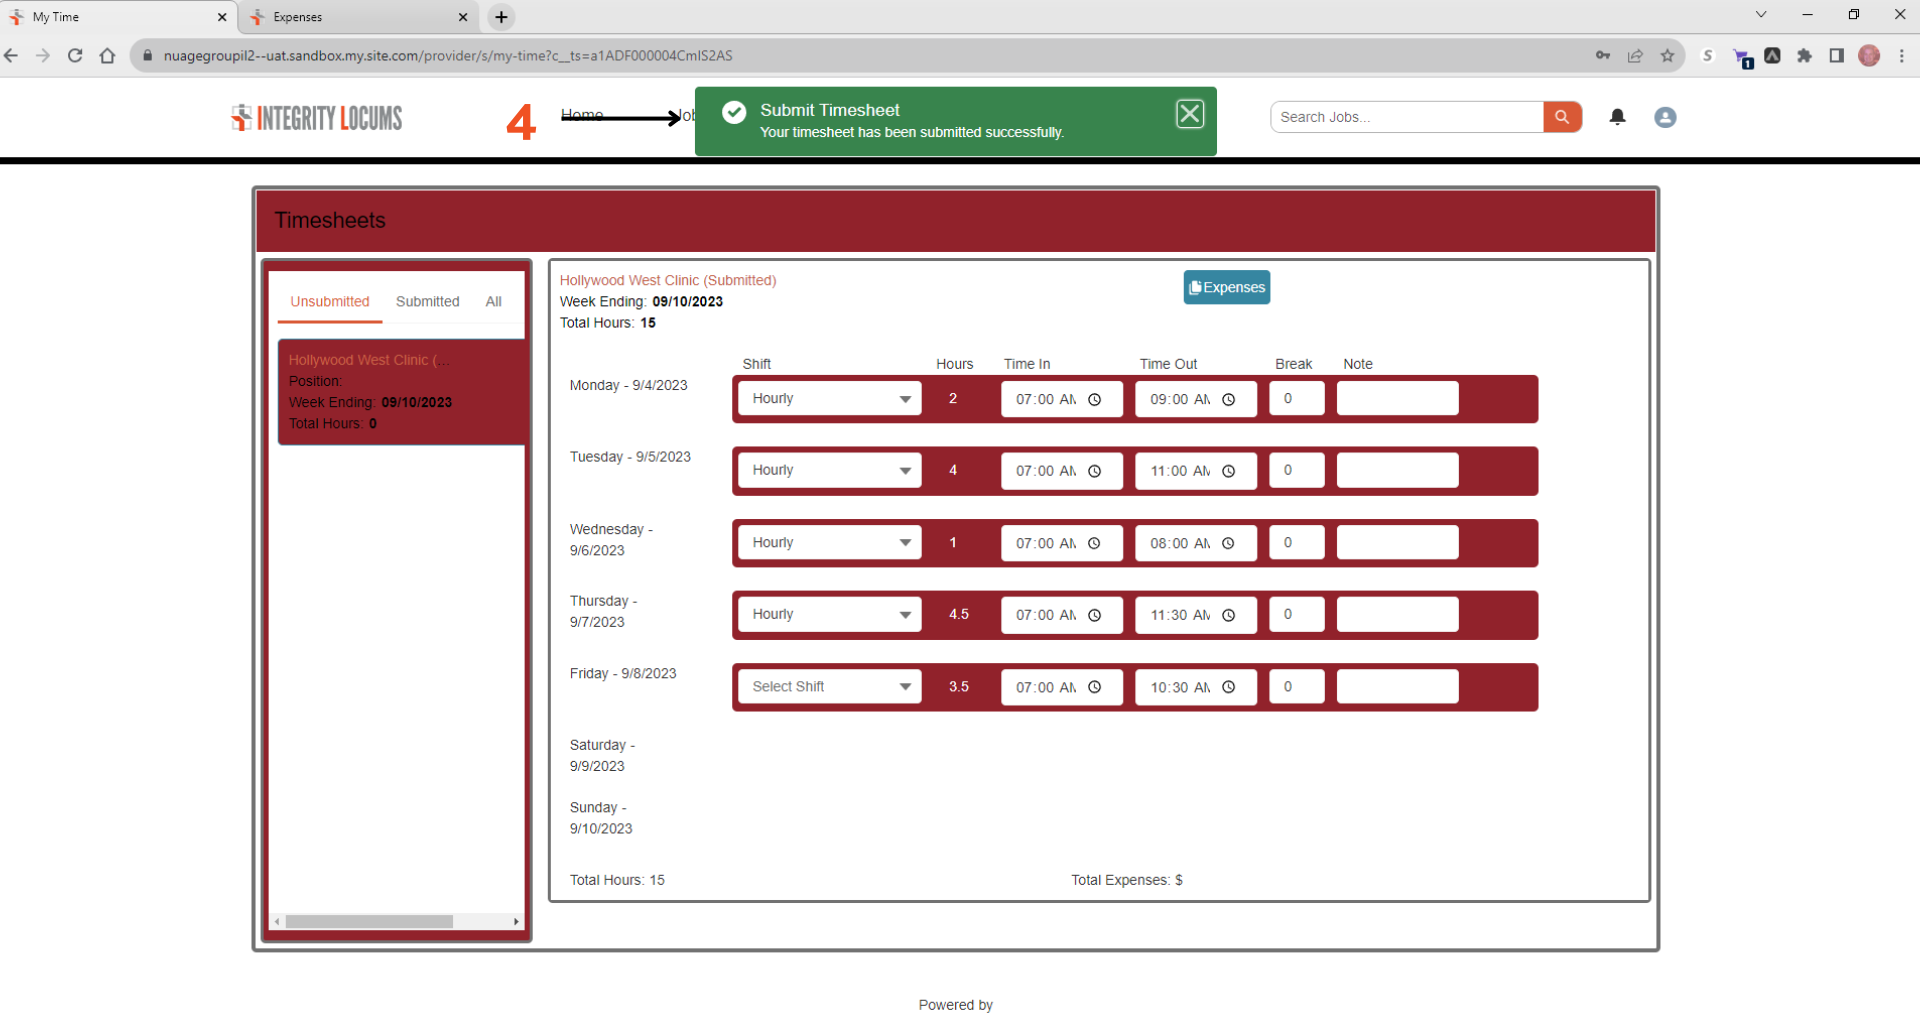
Congratulations, your timesheet and expenses have been submitted! At this point you can either navigate back to your portal, leave the screen or Logout.
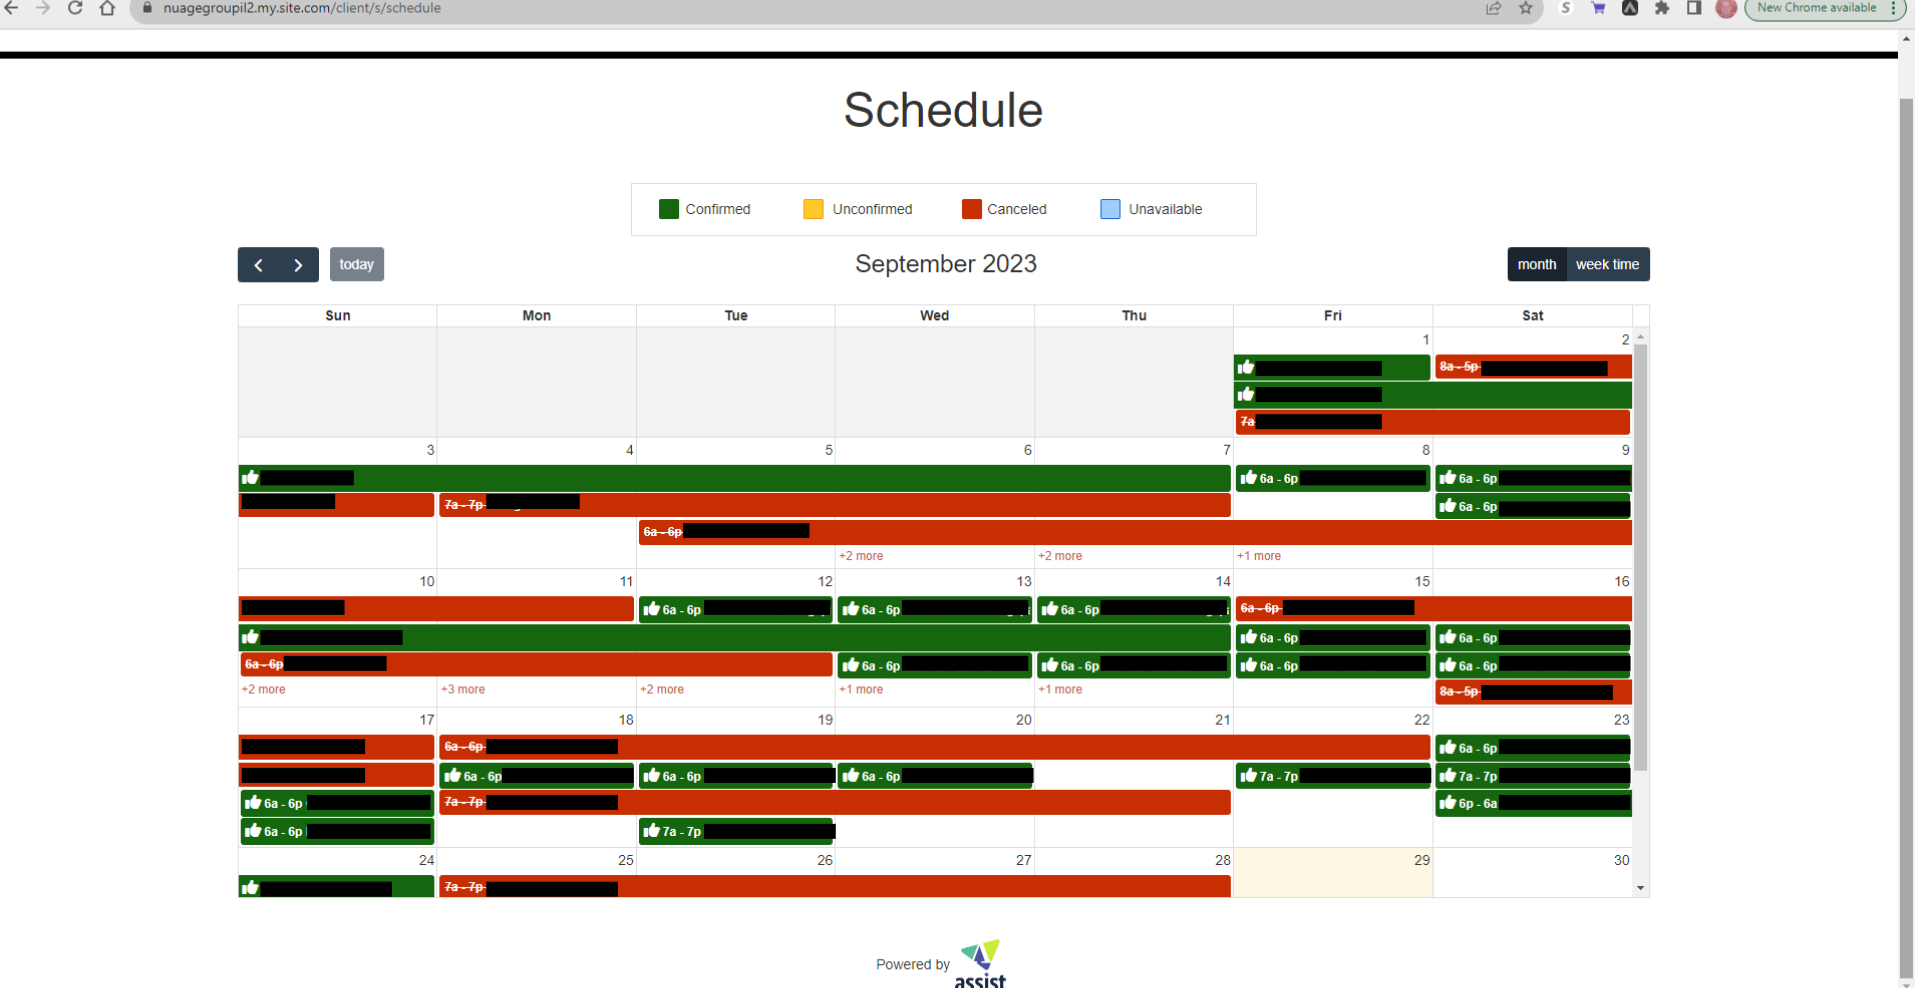
View & Manage My Schedule:
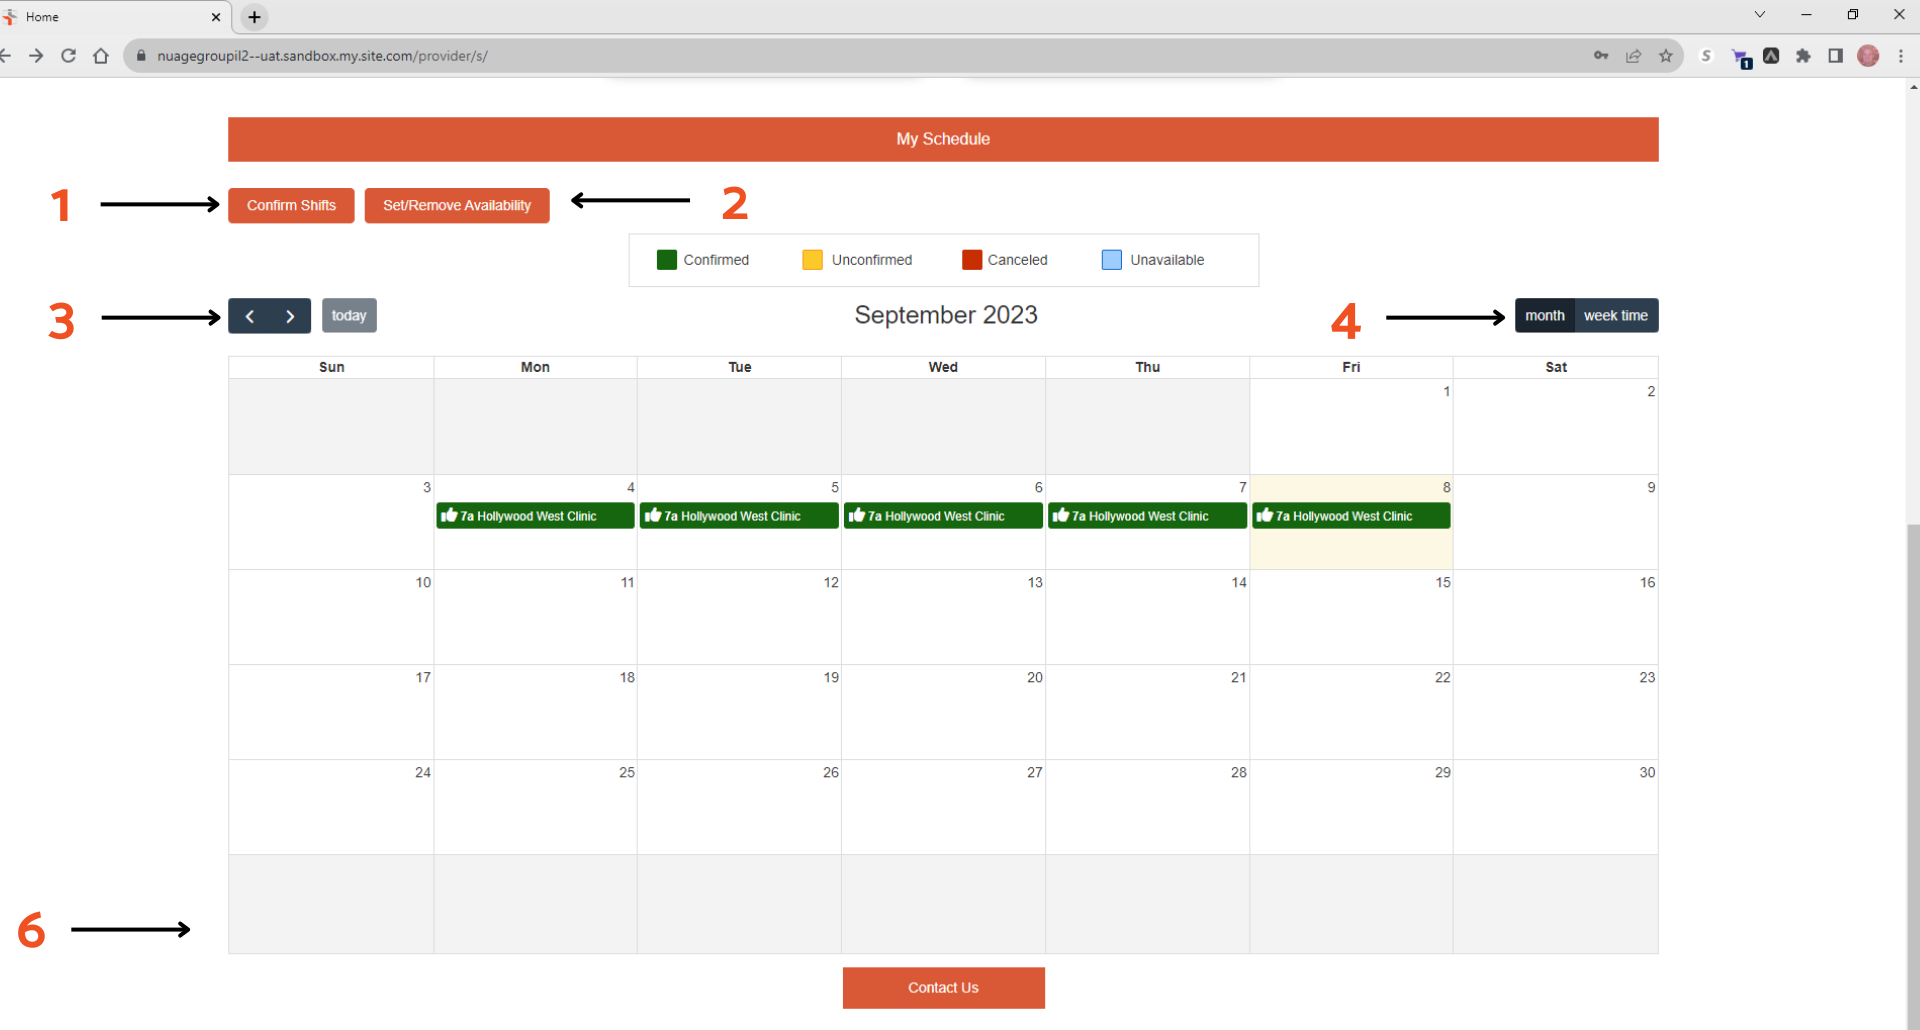
On the main portal page, scroll down below the links to My Time and My Travel to see My Calendar:
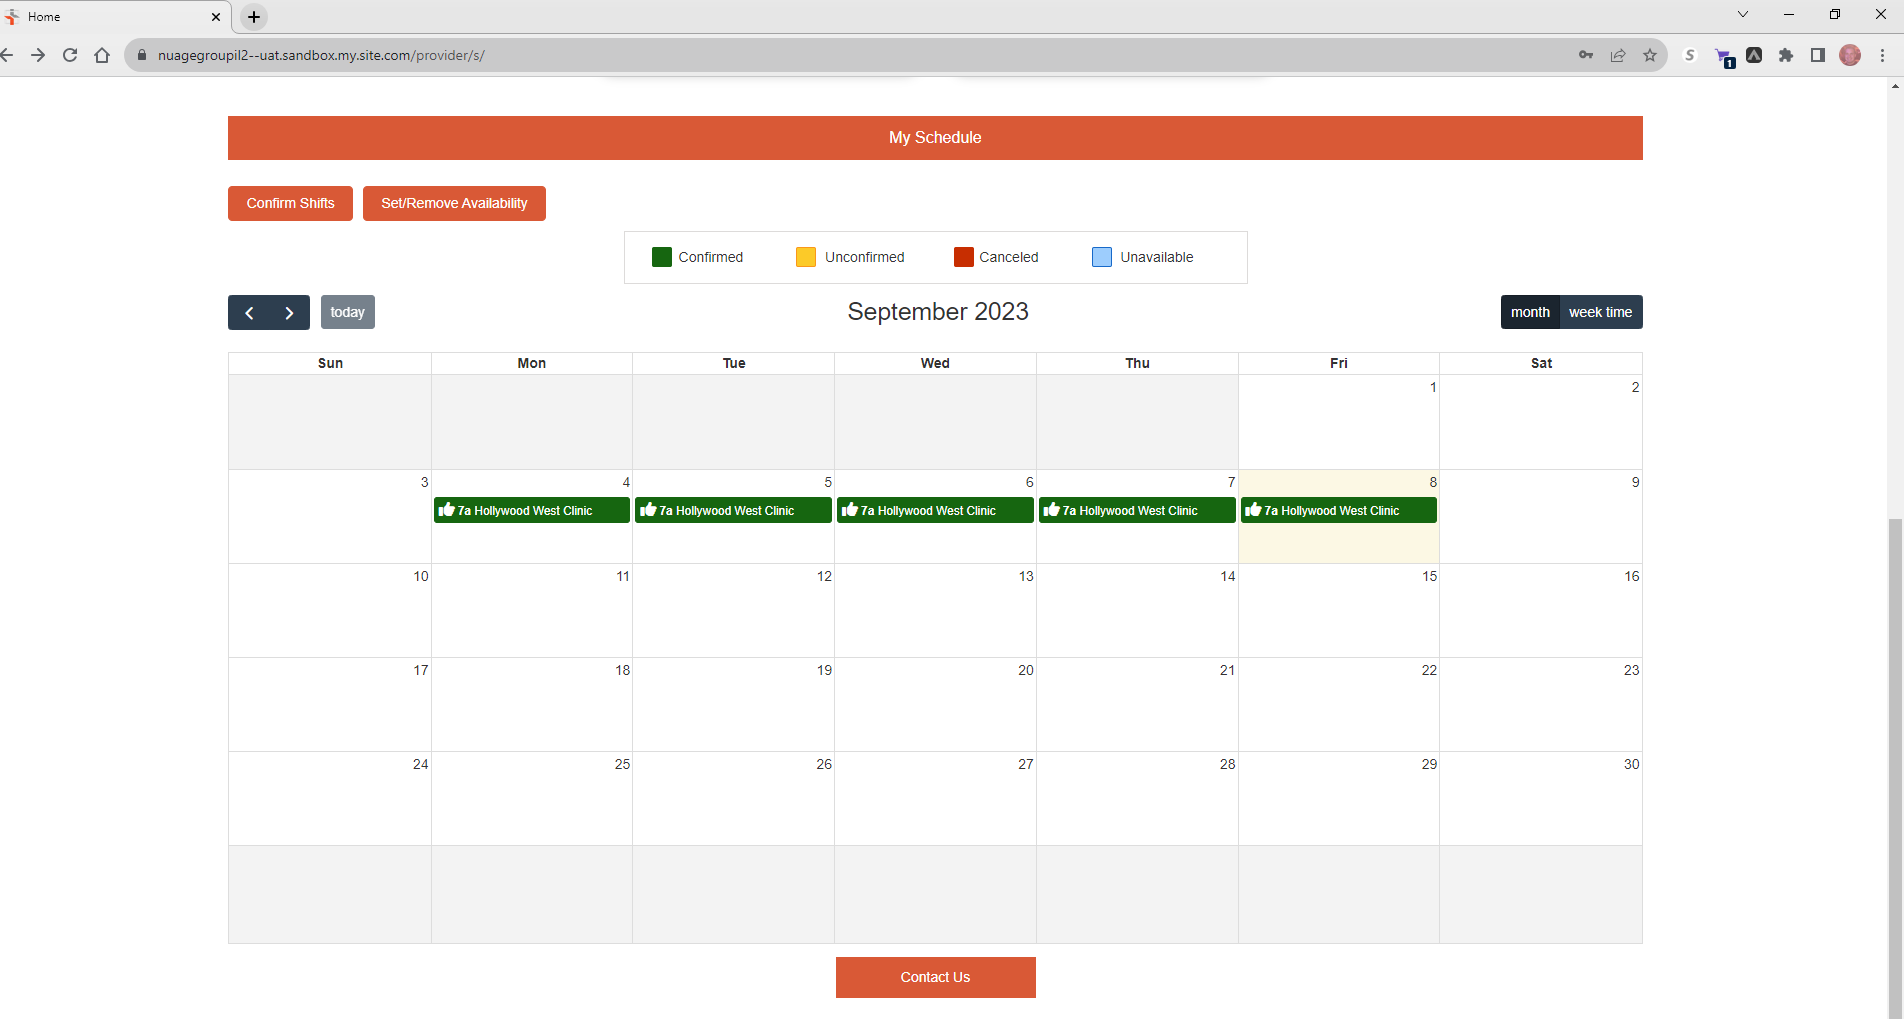
From this view, you can see all upcoming shifts (Confirmed & Unconfirmed), confirm upcoming shifts, and set or remove your availability. My schedule’s main functions include:
1) Confirm all unconfirmed shifts for a selected timeframe by clicking this button. This will open a popup window.
2) Set/remove availability. This will open a popup window.
3) Change what month or week is displayed.
4) Toggle between viewing by month or by week.
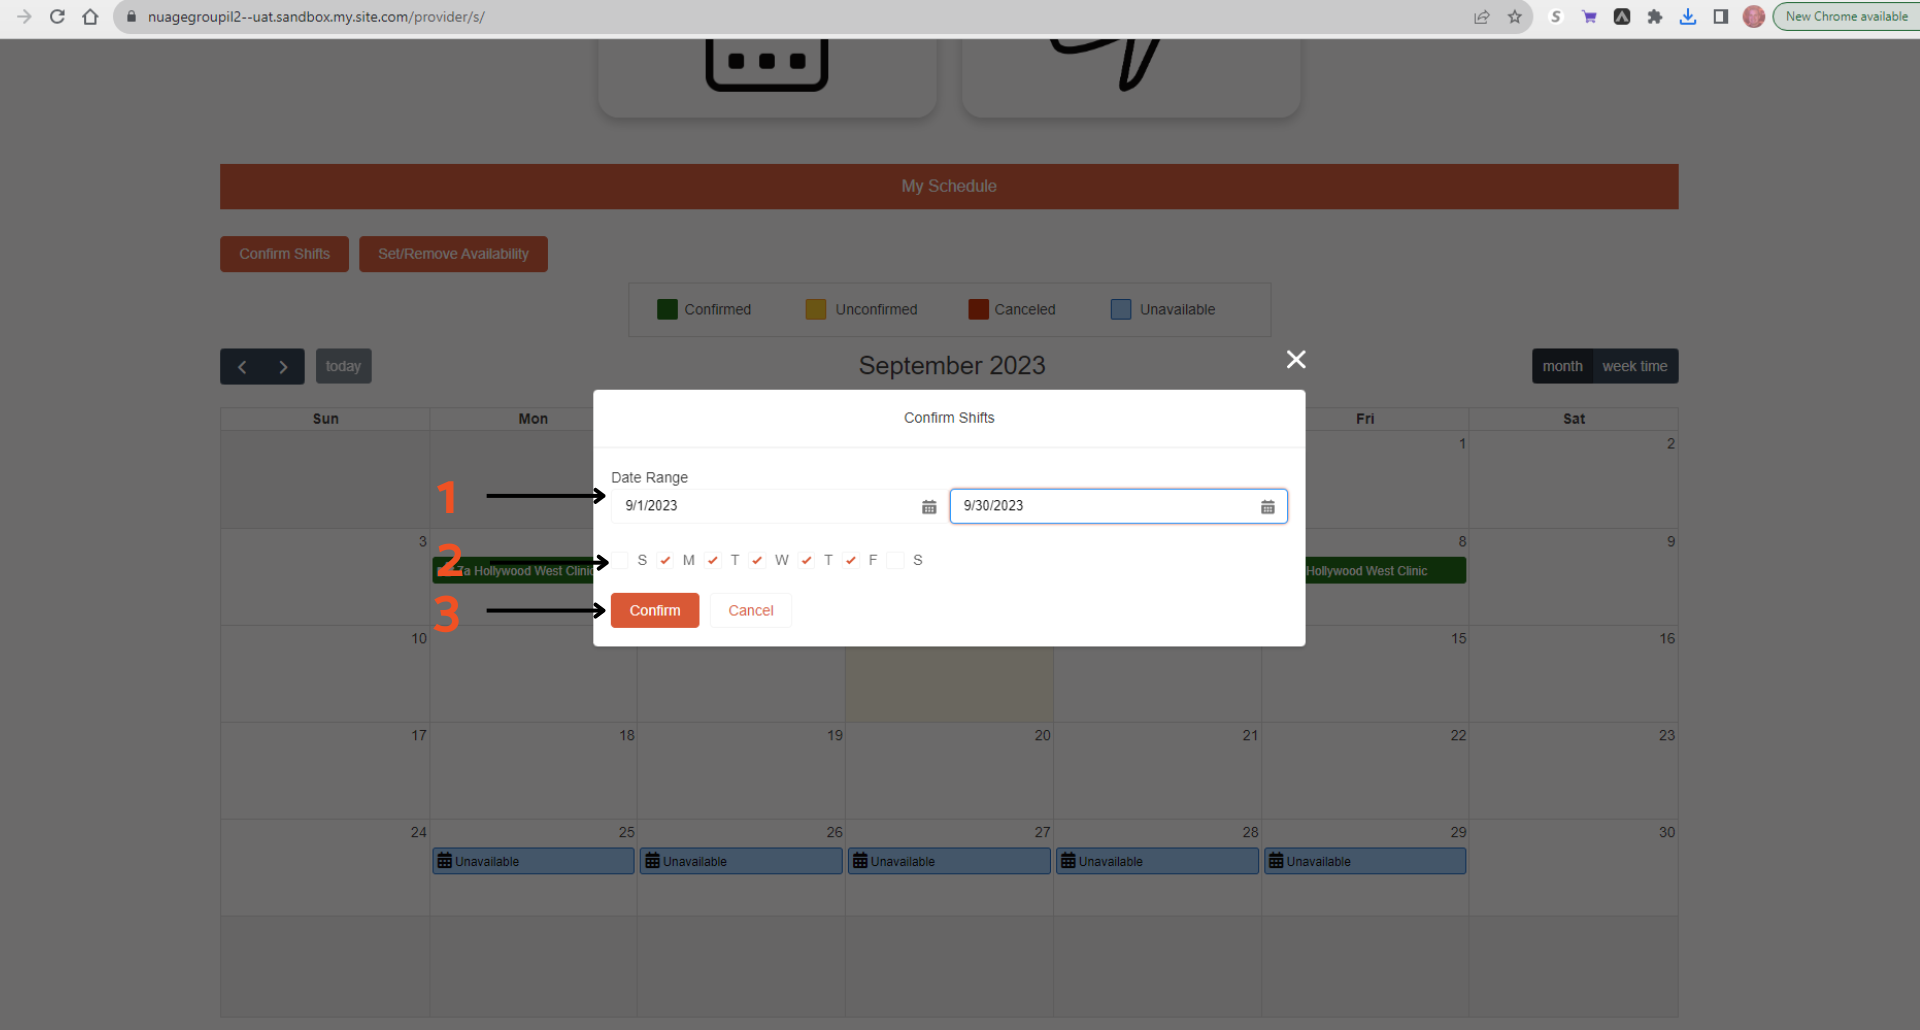
Confirm upcoming shifts:
1) Confirm all unconfirmed shifts for a selected timeframe by clicking the Confirm Shifts button. This will open a popup window.
2) Simply add the dates, select which days of the week to confirm.
3) After you’ve selected the date range and days of the week, simply click Confirm.
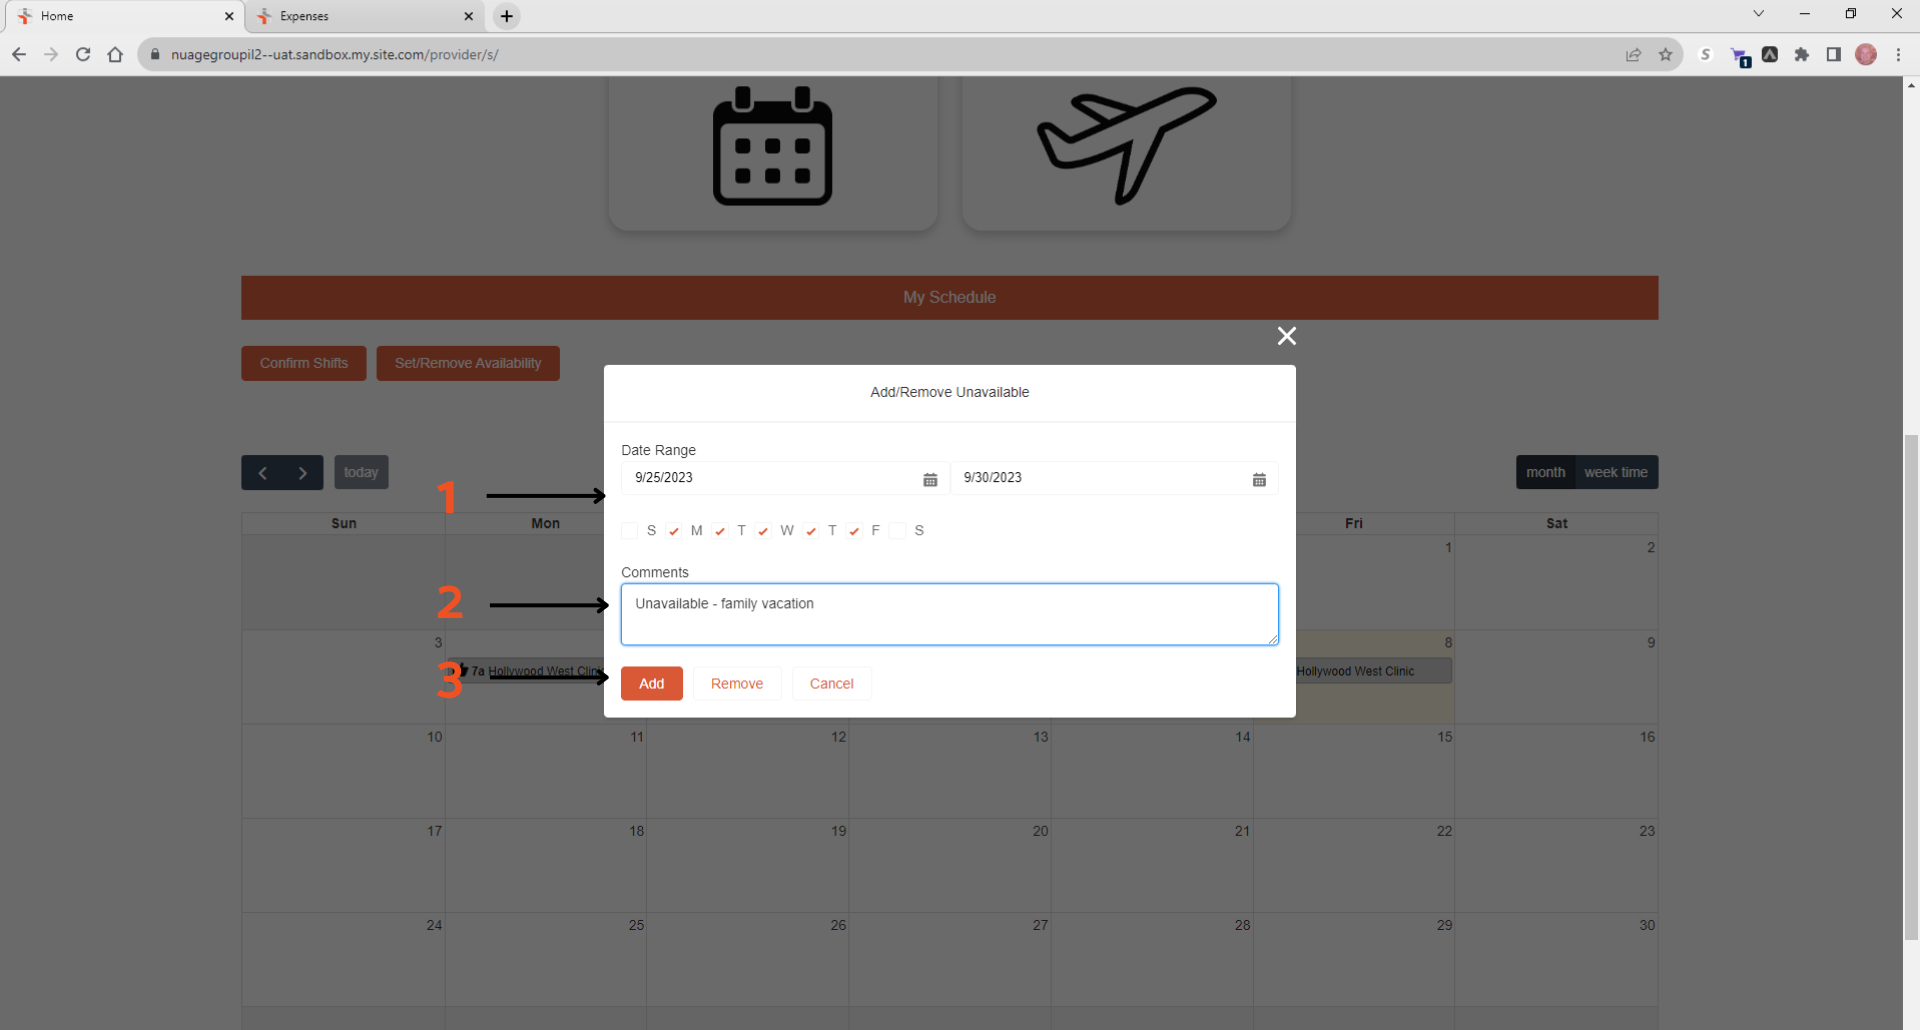
Set/remove availability:
1) Set or remove your availability for a selected timeframe by clicking the Set/remove availability button. This will open a popup window.
2) Simply add the date range, which days of the week, and any explanation for the availability
3) After you’ve added all the info, simply click Add or Remove, depending on which you’re doing.
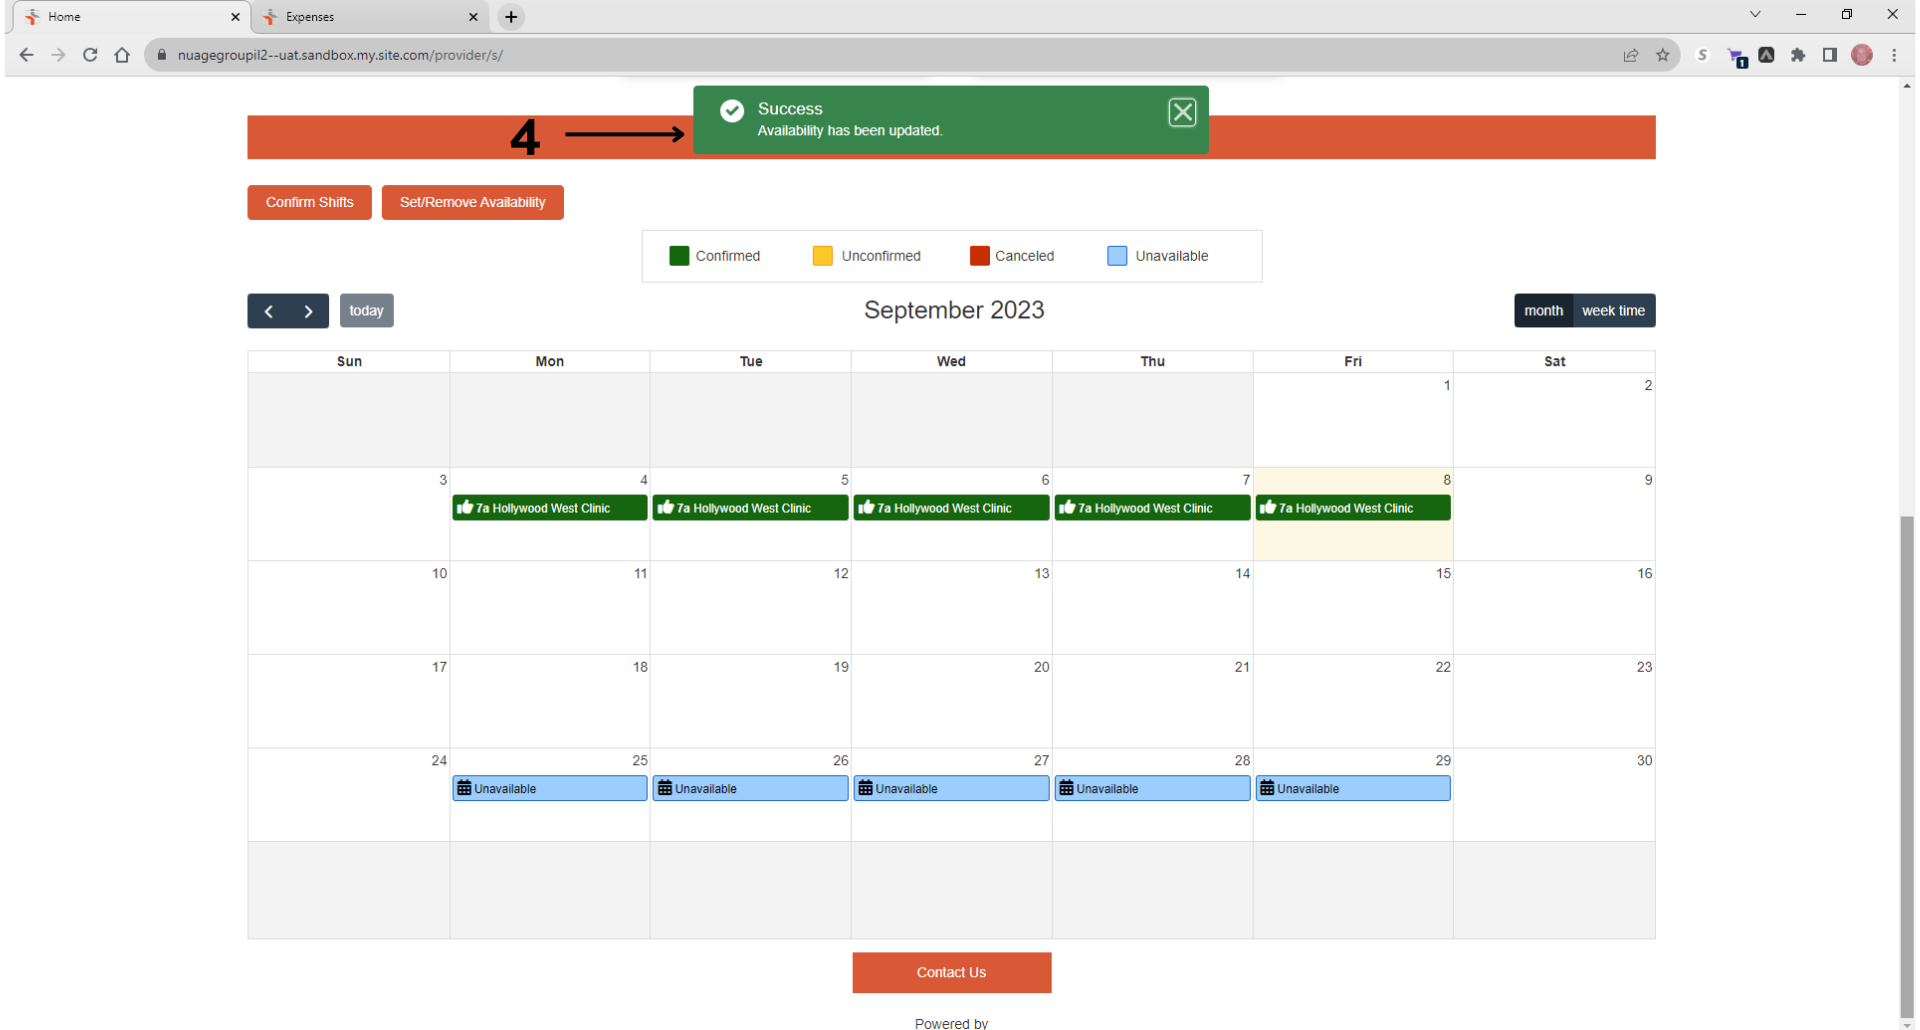
4) After you click Add or Remove, you will see a pop-up message saying “Success. Availability has been updated.”
Approving Time:
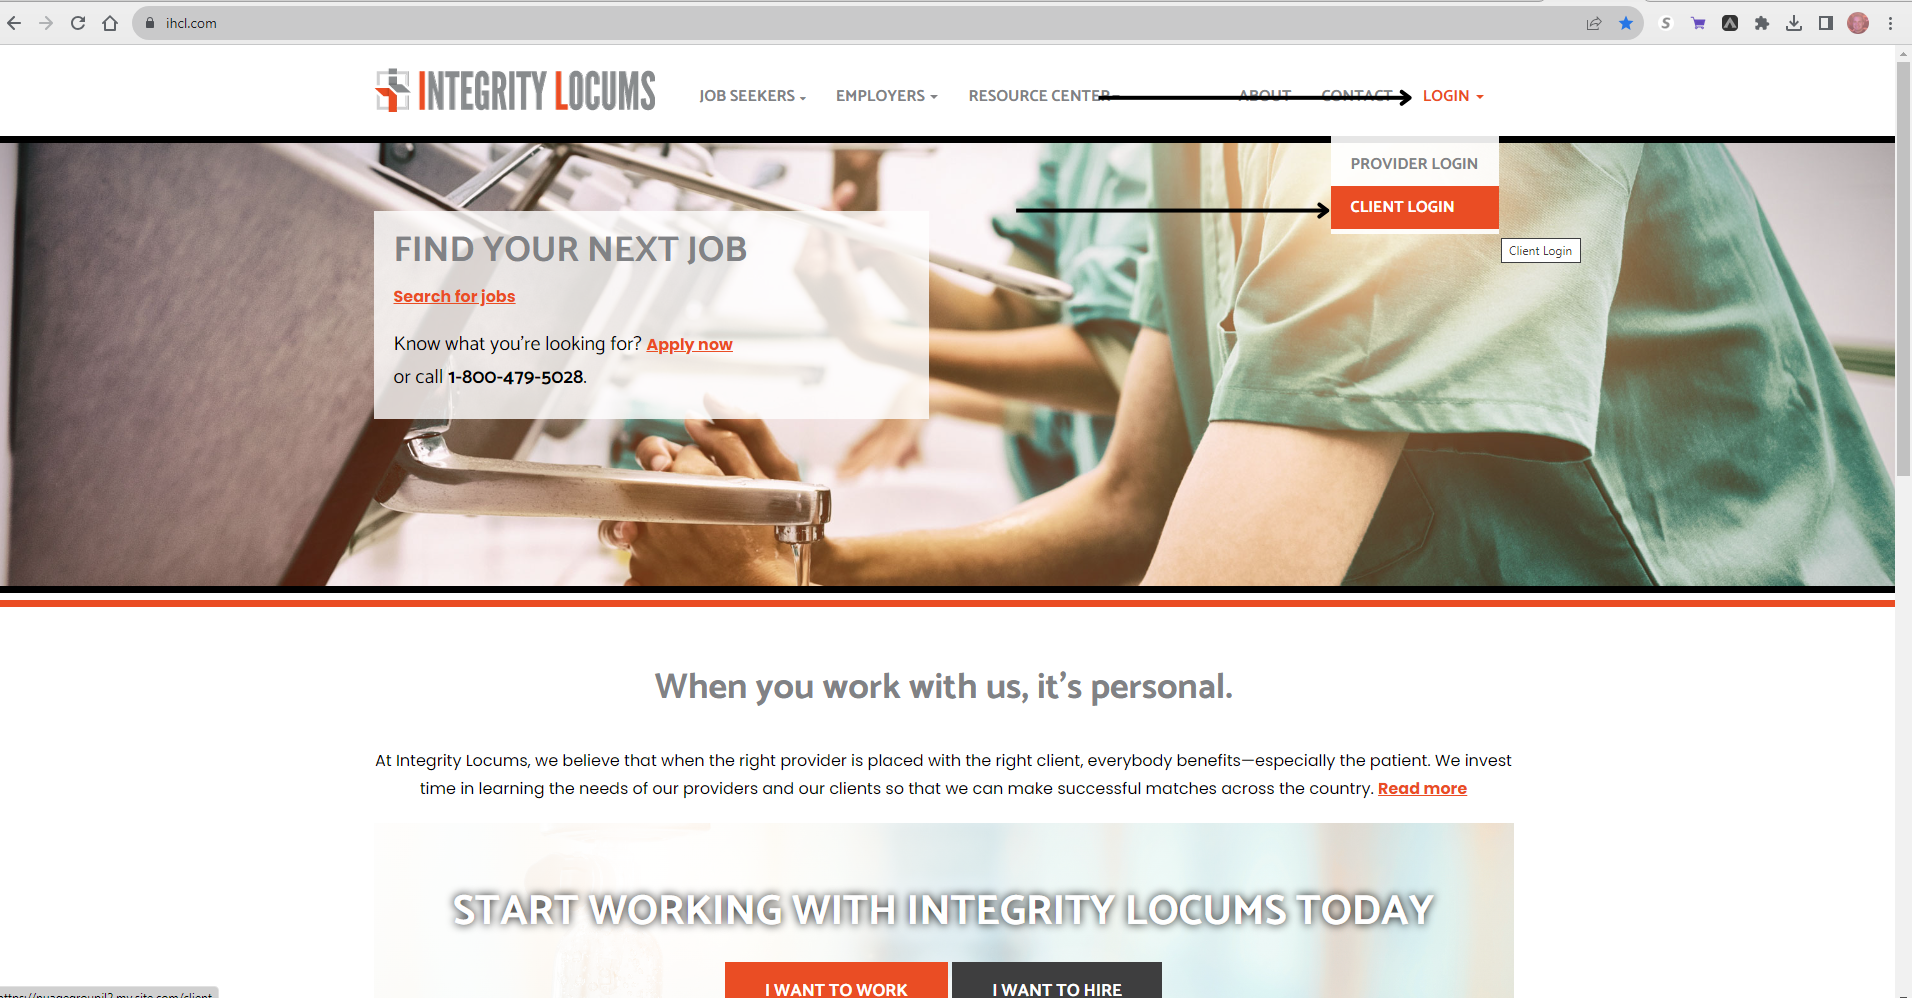
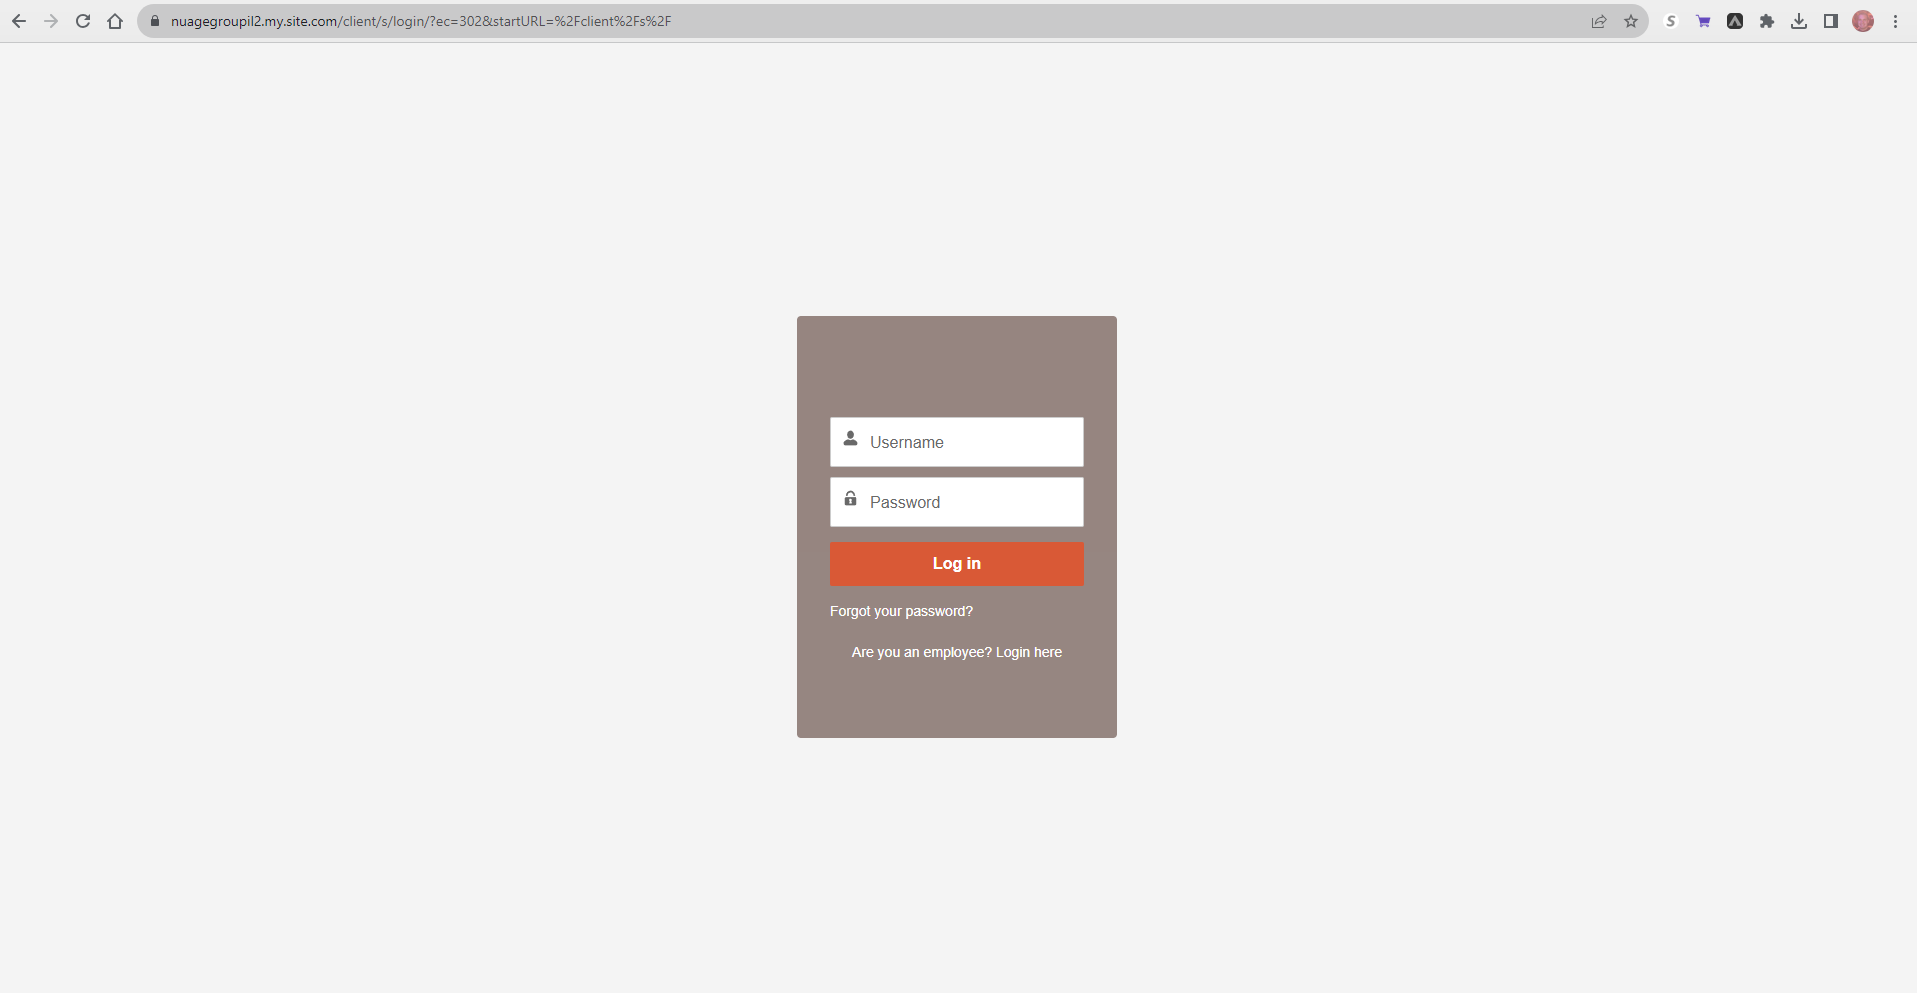
Go to the IHCL website (https://ihcl.com), click the “Login” button near the top right corner of the menu, select “Client Login” and input your username and password to log in. You can also bookmark the login page directly for easier access.
NOTE: If you forget your password, you can reset it at any time by clicking the Forgot Password link.
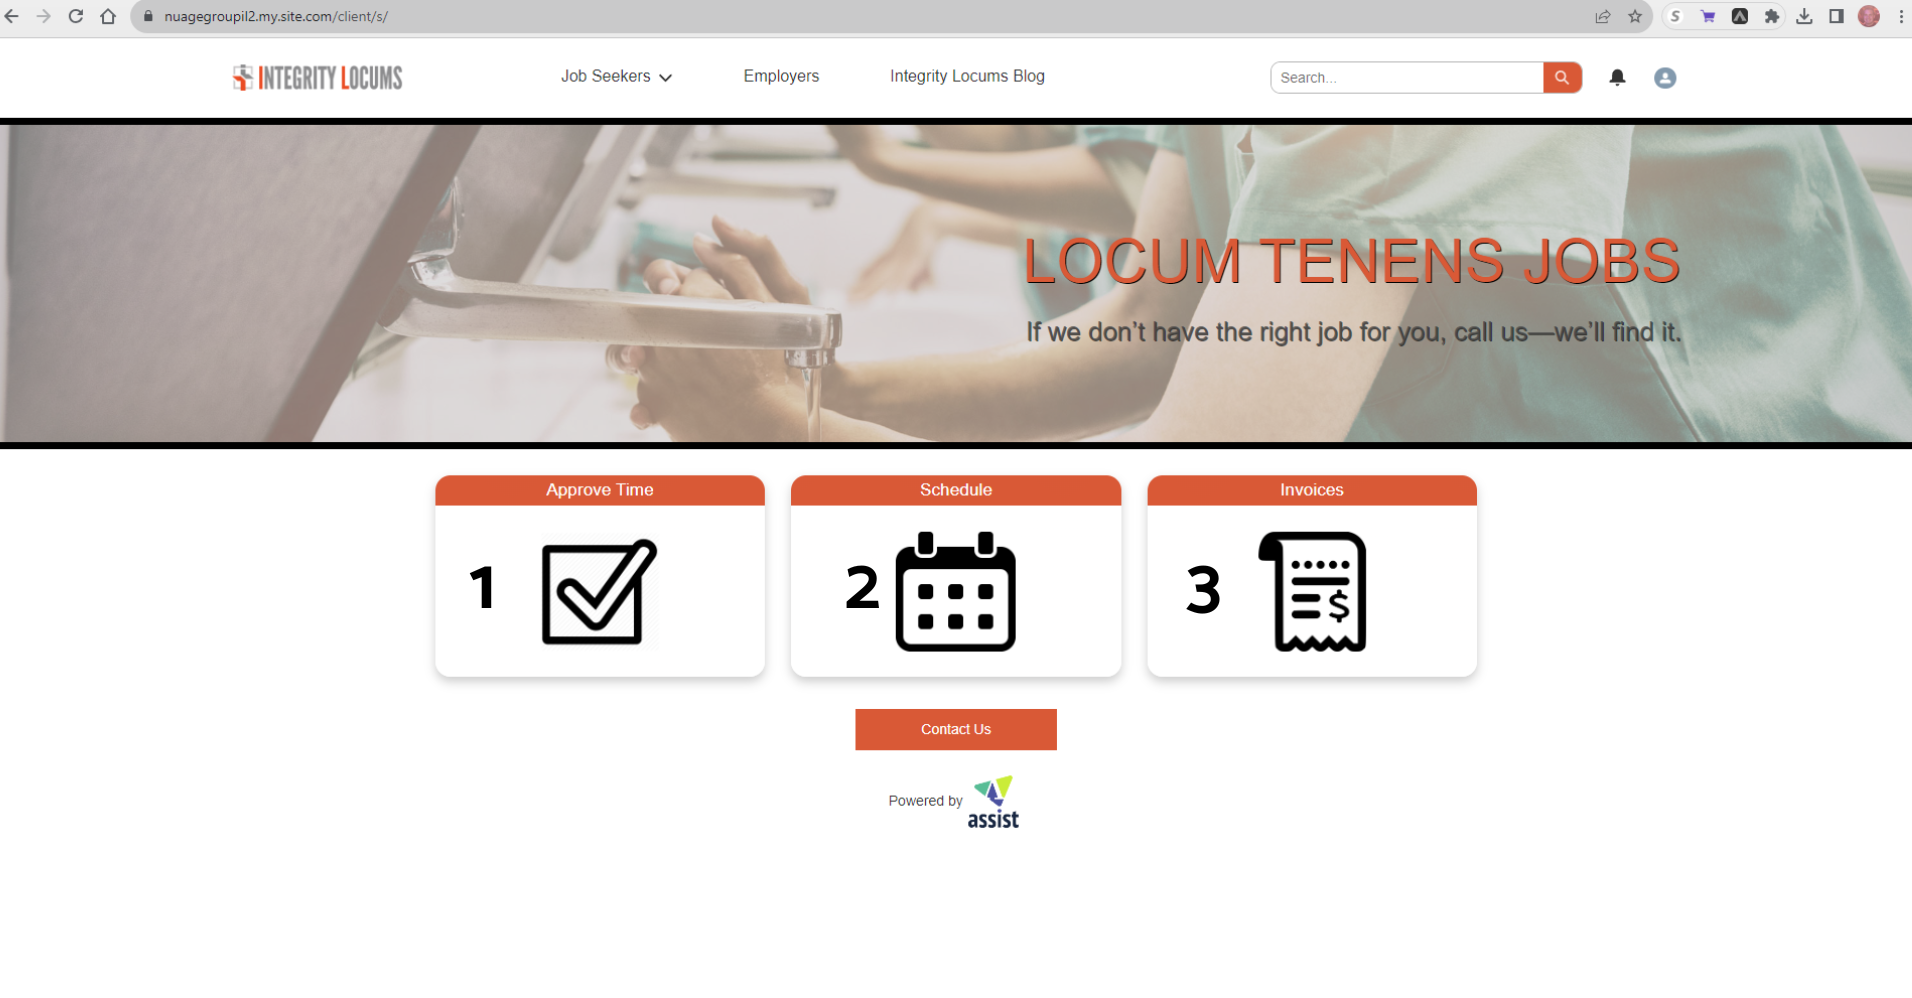
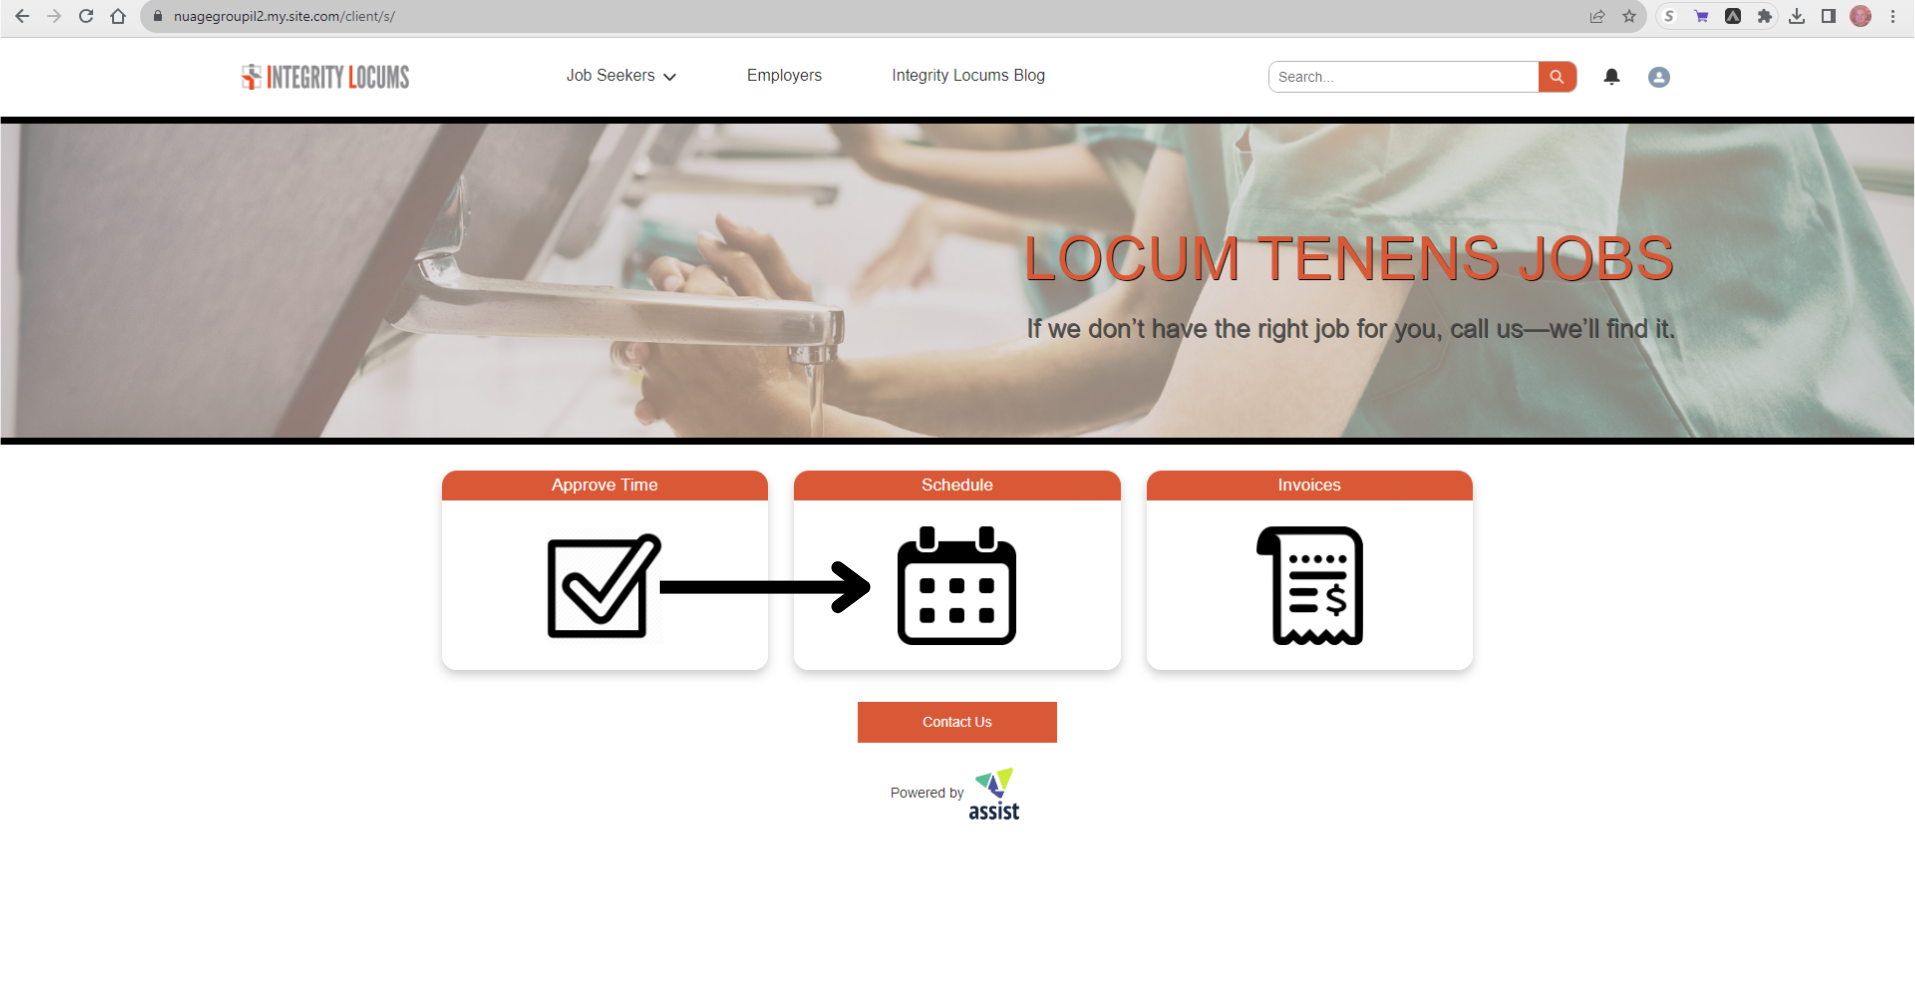
After logging in, you will be taken to the Client Portal Dashboard. The Client Portal Dashboard is made up of three main parts:
1) Approve Time: Manage timesheets and expenses for your locum tenens providers currently working.
2) Schedule: View and manage the schedules for your locum tenens providers.
3) Invoices: View and manage your invoices.
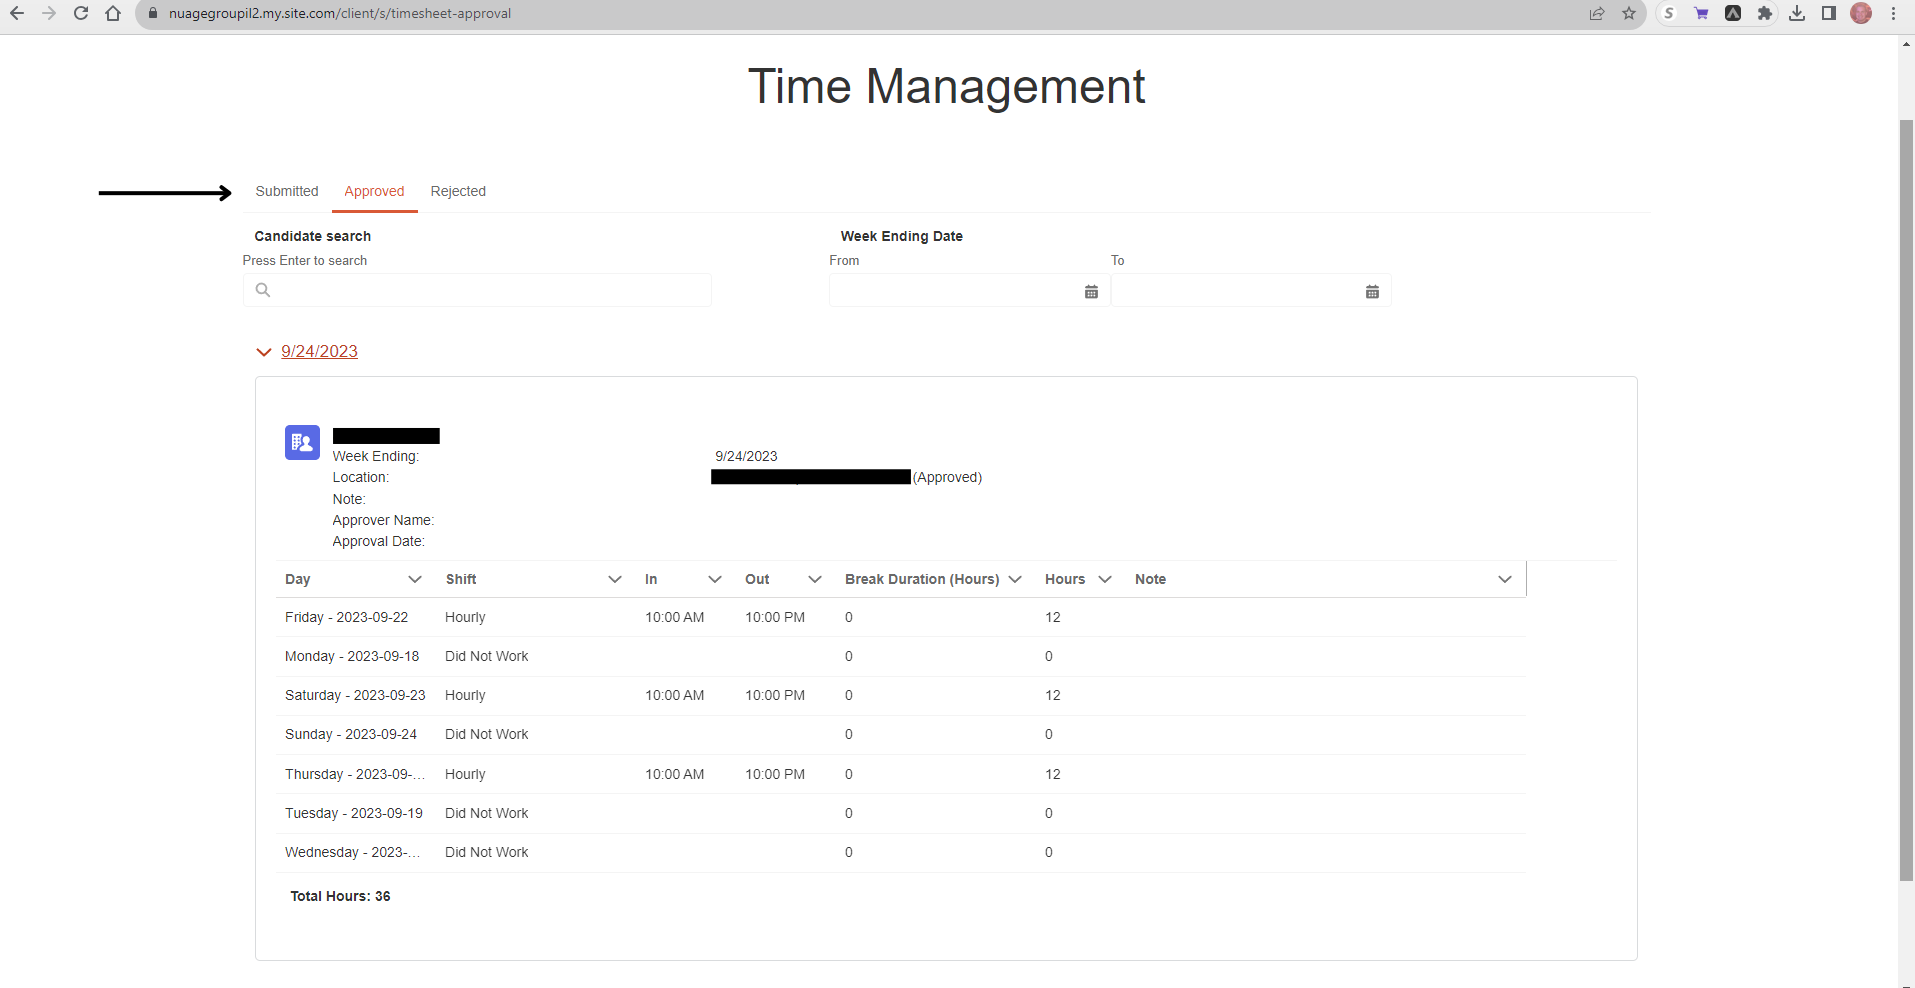
To review and approve timesheets and expenses, click on “Approve Time” and you will be taken to the submitted timesheets screen. Here, you can review all entered hours, any expenses, and review notes from your locum tenens providers. After reviewing, click on “Approve” or “Reject” to approve or reject the timesheet.

To review and approve timesheets and expenses, click on “Approve Time” and you will be taken to the submitted timesheets screen. Here, you can review all entered hours, any expenses, and review notes from your locum tenens providers. After reviewing, click on “Approve” or “Reject” to approve or reject the timesheet.
To view and manage the schedules for your locum tenens provider(s), go to the Client Portal Dashboard and click on “Schedule”.
From the schedule screen, you can view by week or month, and see all shifts, color coded to confirmed, unconfirmed, canceled, and any unavailable days for your providers.